Thursday, March 28, 2013

How To Update New Goophone I5 ROM With Google Play


Here is the guide that how to update Goophone I5 with latest ROM.
The latest ROM for goophone i5.

Fixes:

- Default Language is English (Chinese on the stock software)
- Chinese spam and bloatware removed.
- All chinese apps were translated to english.
- Slide to Unlock on all Languages (Not working on stock software)
- Playstore Installed
- Calendar Bug Fixed
- Slide Poweroff on all languages (Not working on stock software)
- Camara Bug Fixed (On previous software the images where blurried)
- Increased Speed and Performance on all tasks
- Clear Call History bug Fixed (Not working on stock software)
- Contact delete bug fixed (Not working on stock software)
- GPS menu bug fixed (Not working on stock software)
- The possibility to install another launcher the users may like (Not possible on stock software)

Aditional Features:

- Mobile uncle tools installed
- Titanium backup installed
- Apn Manager installed (allow users to set up their own APN settings for 3G network)
- Rebooter (allow users to reboot the phone in just 1 second)
- Es File Explorer
- The ROM is already rooted
- A.I Type keyboard with iphone theme installed

How to install

- Reboot into recovery
- Wipe data/factory reset
- wipe cache
- Advanced -> Wipe Dalvik cache
- Install zip from sd card
- Choose zip from sd card
- goophonei5-xda.zip -> install

And that's it!!

Here is the link to download ROM: Goophone i5 ROM

Wednesday, March 27, 2013

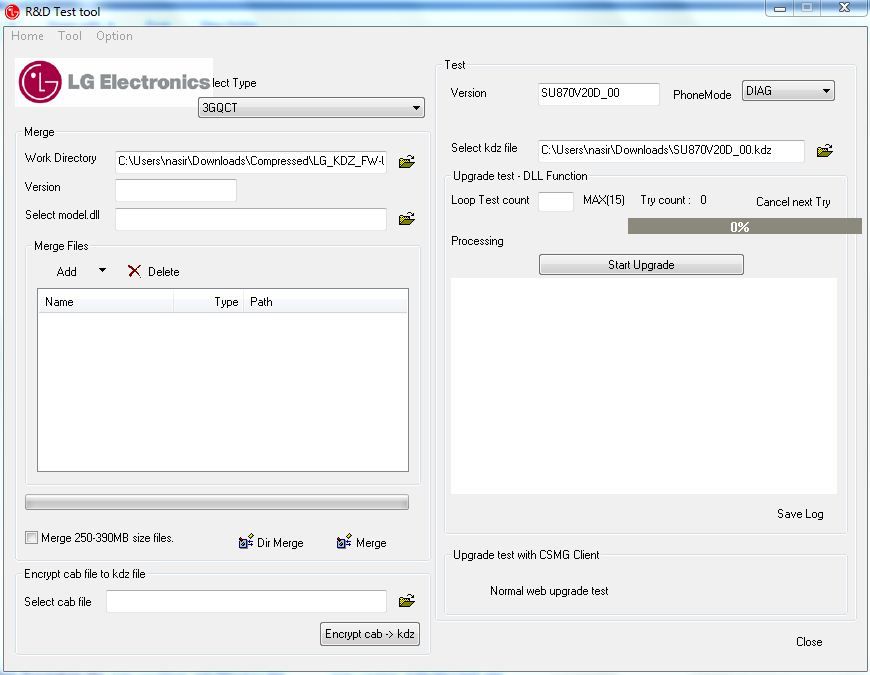
[GUIDE] How to Update KDZ Firmware


  1. Download LG_KDZ_FW-Update_OfflineFix
  2. Download LGUnitedMobileDriver_S4981MAN38AP22_ML_WHQL_Ver_3. 8.1 and install.
  3. Extract LG_KDZ_FW-Update_OfflineFix and setup B2CAppSetup.exe from KDZ_FW_UPD_EN folder.
  4. Connect the phone in normal mode(with USB Debuggin ON) or connect in download mode.
  5. Go to windows menu, type cmd and rightclick and run in administrator mode.
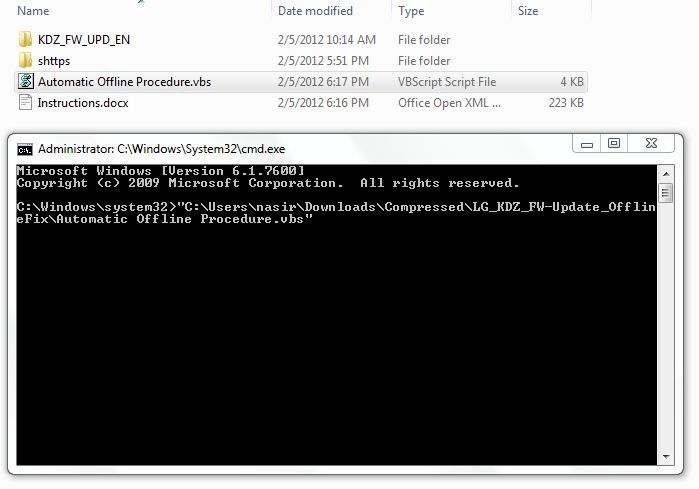
  6. Drag Automatic Offline Procedure.vbs over command prompt and hit enter.
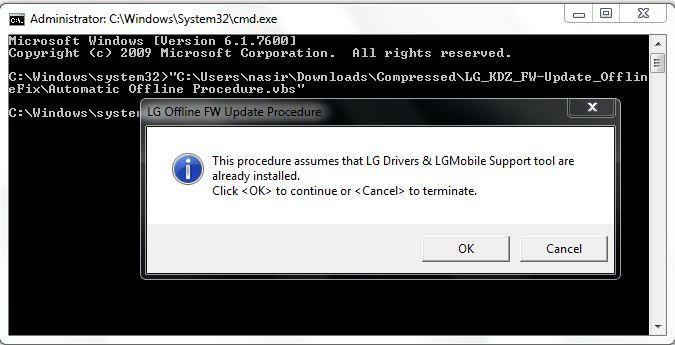
  7. Click OK.
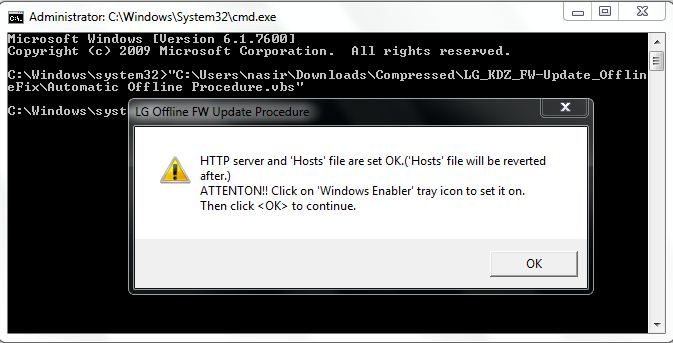
  8. Click on windows enable icon in system tray to turn ON then click the dialog box OK. If you get an error in this stage you have to edit the host file manually (remember tinyumbrella host edit?). Go to C:\Windows\System32\drivers\etc and edit the hosts file. Add 127.0.0.1 csmg.lgmobile.com at the end. You may need Administrator privileges to do that or you can do that in safe mode.
  9. Click OK.
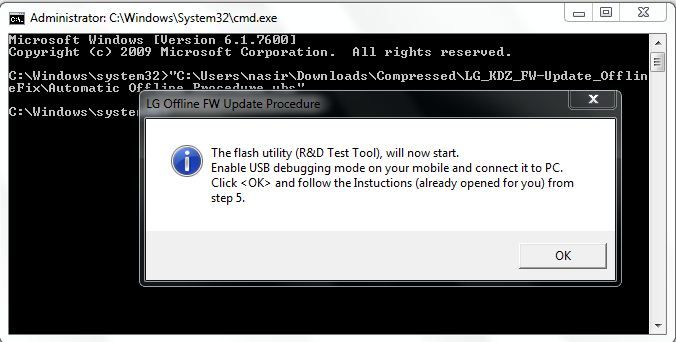
  10. Select KDZ file and click Normal web upgrade test.
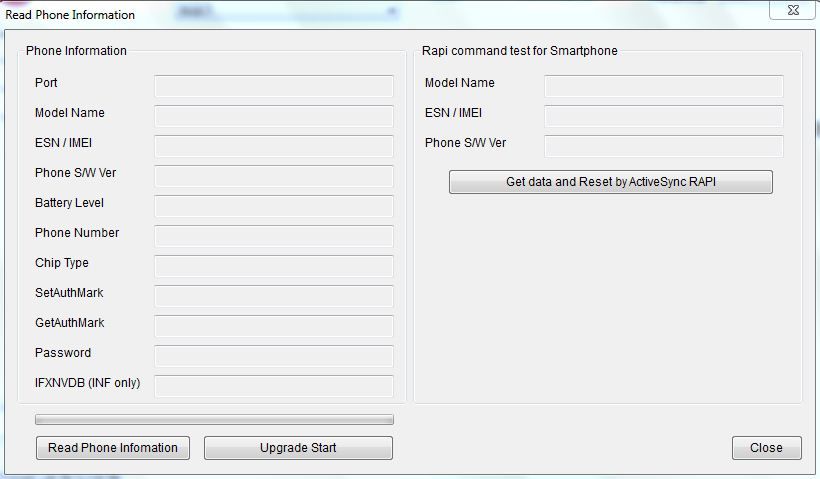
  11. Click on Upgrade Start.
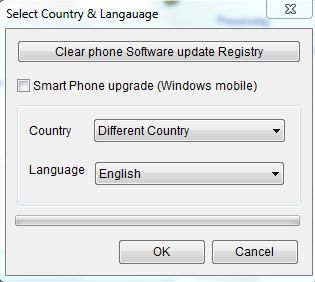
  12. Click on Clear phone Software update Registry and then click OK.


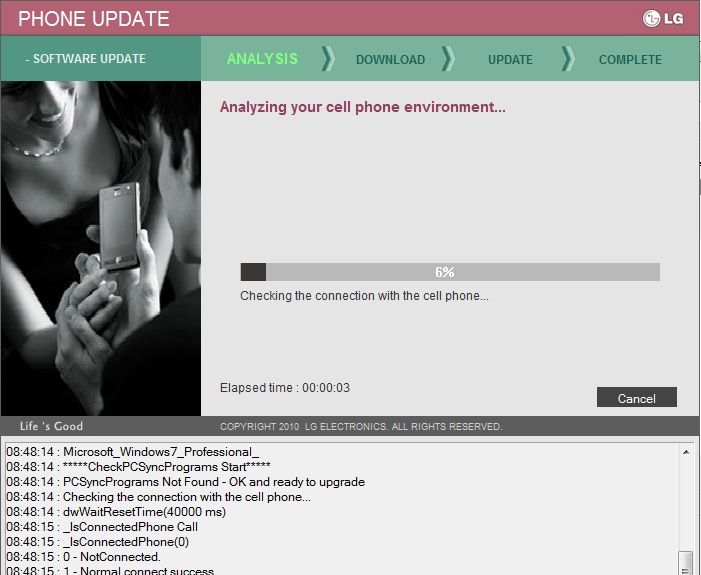
    Software Update Procedure will start immediately. It will take some time to finish. You are DONE.

Monday, March 25, 2013

...:::Uberizer To Improve, Backup, Restore, Control, Root Many Android Devices:::...

Uberizer v1.4


This tool aims to support many android devices. Use the Uberizer to:

  • * connect
    * improve
    * backup
    * control
    * debug
    * unlock full play store
    * mod
    * optimize
    * personalise
    * root
    * and more!


Uberizer Quickstart Guide:
Connecting your device to your computer:

To get started using the Uberizer you will need to connect to your computer. This can be done 2 ways:
* Wireless (RECOMMENDED) (REQUIRES ROOT!)
* Wired (Advanced users only) (Can ROOT devices)

The reason why wireless is recommend is because it's easy! Wired installation requires you to install
the ADB driver which can sometimes have problems, some devices have wierd ADB ports so you will have
problems finding the proper cable for it and some devices don't have ADB ports at all.

** Setting up your device for Wireless Uberizing (RECOMMENDED)

1. Go to the Wireless Menu (w)
2. Enable Wireless ADB using ONE of these options: 2, 4 or 5, whichever is most easy for your situation.
3. If you use an app (4 or 5), start the app on your Android device.
Use option 6 to connect to the given IP in the app.
If you chose option 2, you must find your device IP, go to Settings, About device, Status, to see the IP.

** Setting up your device for Wired Uberizing (Advanced users only)

1. Install ADB drivers (from dir usb_driver) for wired ADB
2. Boot Android, connect device (on the device, the statusbar will display "usb debugging mode is activated")
3. Run this tool, analyse device so this tool can seek info of your device
and will check if your model is supported by mods

NOTE: Your device must have "ADB Debugging" checked in: "Settings \ Developer options \ USB debugging (Debug mode when USB is connected)"


Uberizer main menu:
a. Analyse device (find model)
- Rescans for a device, use this after connecting another android device to your computer.

b. Build Menu
+ 1.Auto Mod build.prop
* Automatically adds several build.prop tweaks and enhancements.
+ 2.Edit build.prop and push it back
* A handy way to quickly check or edit a few build properties.
+ 3.Market build.prop fixes
* Strips out the current market fingerprint and copies the modded build.prop to the
device. Currently this emulates a Samsung for full market (Google Play) access.
+ 4.Backup current build.prop on device
* Dumps a copy of your build.prop to \backups, the prop dump name includes your model
name, the current date and time of dump. To easily restore these backups, run 5.
+ 5.Restore a build.prop backup
* Indexes all backupped build.prop files on the system and allows the user to chose
which file (s)he wants to restore on the tablet.

c. Root Menu
+ 1.Android 1.6 Donut (tested on WM8505)
+ 2.Android 1.6 Donut MAA (tested on WM8505)
+ 3.Android 2.2 Froyo (WM8650)
+ 4.Android 2.3 GingerBread (WM8710)
+ 5.Android 3.0 HoneyComb
+ 6.Android 4.0 ICS (tested on A13)
+ 7.Android 4.0 ICS MIPS (tested on Ainovo)
+ 8.Android 4.0 ICS (tested on WM8850)
+ 9.Android 4.0 ICS v2
+ 10.Android 4.0 ICS HTC (alpha)
+ 11.Backup current root bin and su app
* Backups the system\(x/s)bin\su bins and superuser.apk to \backups\system (x/s)bin and \app
+ 12.Restore root backup
* Writes the \backups su bins and superuser.apk back to the device.
+ 13.Unroots device
* Removes su bins and superuser from device and sets default back.
+ 14.Check device root
* Installs and starts the latest free version of Joey Krim's Root Checker

d. Backup Menu
+ 0.Full device "unmod" backup to backups\%MODEL%_%DATE%_%TIME%
* Creates a set of files that the uberizer tries to mod on your android device.
+ 1.Backup build.prop to backups\
* Dumps a copy of your build.prop to \backups, the prop dump name includes your model
name, the current date and time of dump. To easily restore these backups, run 5.
+ 2.Restore build.prop
* Indexes all backupped build.prop files on the system and allows the user to chose
which file (s)he wants to restore on the tablet.
+ 3.Backup bootanimation.zip to backups\
* Dumps a copy of your bootanimation to backups\bootanimation.zip
+ 4.Restore bootanimation.zip
* Displays a selection menu of bootanimation.zips from \backups and pushes the animation to your android device.
+ 5.Backup data\ to backups\data.tgz
* REQ ROOT. This will backup your full /data partition, very nice to backup all your
downloaded apps with their settings if you are planning to reflash your device.
+ 6.Backup data\app to backups\data_app.tgz
* REQ ROOT. This will backup only data\data\apps, your "downloaded" apps. Very useful
for sharing apps with your friends or when you are planning to reflash your device.
+ 7.Backup data\data 2 backups\data_data.tgz
* REQ ROOT. This will backup only all the app settings on your device.
+ 8.Restore 5. data.tgz backup
* Easily restore backups done with option 5.
+ 9.Restore 6. data_app.tgz backup
* Easily restore backups done with option 6.
+ 10.Restore 7. data_data.tgz backup
* Easily restore backups done with option 7.
+ 11.Backup current root bins and su app
* Backups the system\(x/s)bin\su bins and superuser.apk to \backups\system (x/s)bin and \app.
+ 12.Restore backed up root bins and su app
* Writes the \backups su bins and superuser.apk back to the device.
+ 13.Backup hosts file
* Backups your current hosts file of your device to backups\hosts_%date%_%time%.
+ 14.Restore hosts file
* Easily restore a previously backupped hosts file.
+ 15.Backup init files to backups\init.tgz
* This will take all init rc files from your device and stores them into \backups seperately,
but also this will make a tgz of the original files. This tgz is easy to recover using
option 16, because it's a tgz the original attributes remain. You can mod the seperately
dumped init files and adb shell chmod 750 them when you push them back.
+ 16.Restore init files backups\init.tgz
* Brings up a selection menu to easily select your previously created init backup.

e. Bootanimation Menu
+ 1.Backup current bootanimation.zip
* Dumps a copy of your bootanimation to backups\bootanimation.zip.
+ 2.Copy new bootanimation.zip
* Write back backups\bootanimation.zip to your android device.
+ 3.Delete bootanimation.zip on device
* This removes the bootanimation.zip from your device, this might slightly improve your
boot time.
+ 4.Recover backed up bootanimation.zip
* Brings up a selection menu with current backed up bootanimation.zip files in \backups.

f. Multi Mod Tool Menu
+ 1.undex (baksmali)
* Undex amm_files\undex_input_files\classes.dex to undex_output_files.
+ 2.dex (smali)
* Rebuilts dex from \dex_input_files and writes to dex_output_files.
+ 2a.dex (smali) dex default undex output dir
* Rebuilts dex from \undex_output_files\out and writes to \dex_output_files.
+ 3.Jar maker
* Creates one .jar file from \jarmaker_input_files dir, a generated .jar file will appear in jarmaker_output_files.
+ 3a.Jar maker using existing meta-inf\manifest.mf
* Creates one .jar file from \jarmaker_input_files dir, a generated .jar file will appear in jarmaker_output_files with manifest.mf.
+ 4.APK sign (batch-mode)
* HcH's Microsigner, a simple way to sign a load of apks.
+ 5.Update.zip maker
* Creates simple update.zip file. Input dir \updatezip_input_files, Output zip file will be written in \updatezip_input_files
+ 6.Jarsigner
* A tool to sign jar files, certs/keys included! Input file: \amm_files\jarsigner_input_files\unsigned.jar
+ 7.OptiPNG
* Optimize those PNG files for maximum loading speeds! Dump all your pngs in optipng_files and run this option.
+ 8.framework-res.apk OptiPNG (alpha)
* A attempt to automatically optimize a framework-res.apk. This rebuilts the framework and signs it.
+ 9.batch extract and decrypt manifest from apks in \aapt_input_files
+ 10.batch generate APK application details from apks in \aapt_input_files
+ 11.batch generate APK extreme details from apks in \aapt_input_files

g. Application Manager Menu
+ 1.Batch install apps (from \install_apk)
* This installs all the apk files you have stored in \install_apk on your device.
+ 2.Install1app (select from \install_apk)
* This brings up a selection menu of all the apk files you have stored in \install_apk on your device. You can select one you want to install.
+ 3.Backup system apps to backups\sysappstgz
* Backups the system apps of your device to backups \system_apps.tgz
+ 4.Backup data apps to backups\data_appstgz
* Backups the data apps of your device to backups \data_apps.tgz
+ 5.Restore 4. data apps package to device
* This easily restores a previously created backup with option 4
+ 6.Backup 1 app to backup\ .apk
* Creates a list of all your downloaded apps, enter the generated number of the app
you wish to backup, and the app will be downloaded to \backups.

h. Help me
1.Go to the Wireless Menu (w)
2.Enable Wireless ADB using ONE of these options: 2, 4 or 5, whichever is most easy for your situation.
3.If you use an app (4 or 5), start the app on your Android device.
Use option 6 to connect to the given IP in the app.
If you chose option 2, you must find your device IP, go to Settings, About device, Status, to see the IP.

1.Install ADB drivers (from dir usb_driver) for wired ADB
2.Boot Android, connect device (on the device, the statusbar will display "usb debugging mode is activated")
3.Run this tool, analyse device so this tool can seek info of your device
and will check if your model is supported by mods

i. A1X Firmware Menu
+ 1.IMG unpacker
* unpacks rom_kitchen\original.img, the main files are stored in _input.
+ 2.IMG packer (rom_kitchen\_input)
* rebuilts your modded files that are previously extracted to a IMG file (output.img)
+ 3.Dump A1X firmware to Uberizer dir
* this will dump your A10 or A13 firmware in a sub directory of Uberizer.
+ 4.Restore A1X firmware from \rom_dumps
Restore a previously created rom dump with option 3. Special Thanks to Satcomranger for risking his tablet's life and coding fixes for the procedure.
+ 5.Start LiveSuit Pack v1.09
Start LiveSuit for manual flashing or formatting your A10/A13 device

j. Install full market
+ installs a hacked market apk with unrestricted market access, plus fake
the fingerprint of galaxy tab to gain more access. NOTE: if you have a
different cpu model than armeabi-v7a, like mips for example, you won't
see all available apps, you will see everything fit for your
"product.cpu.abi", you can see your cpu in the build prop (option b/2)

k. Various Mods Menu
+ 1. Sync device FS
* syncs android device's FS, for safe shutdown for example.
+ 2. Clean Dalvic Cache
* cleans the dalvic cache
+ 3. Add Tar 1.23 bin (auto backups old)
* this adds the real deal TAR binary to your android device!
+ 4. Install anti ad and malware hosts file
* adds the MVPS hosts file to protect you against the most known malware servers.
+ 5. Add GREP/EGREP/FGREP 2.6 bins
* adds the GREP binaries to your android device, enjoy full grep functionality!
+ 6. Add PHP v5.3.2 and Groomdroid webserver
* copies needed files and installs a PHP pre-configured Groomdroid web server.
+ 7. ICS Screen Capture to /screenshots
* takes a screenshot of your screen and stores it in /screenshots
+ 8. Add Capture ICS bin to device
* adds the ICS capture bin to your device, EXPERIMENTAL FEATURE . UNTESTED
+ 9. Add bash 4.1 bin to device
* for those Shell Ninjas out there, here it is ... BASH 4.1 on android!
+ 10. Config Groomdroid on device
* easily edit your config.
+ 11. Auto Market and Framework Cache clean
* performs the "market flush" for you.
+ 12. System App Remover (with auto backup)
* Makes a list of all the system apps with numbers, input the prefixed number and
the system app will be automatically backed up to /backups/%APKNAME%_%DATE%_%TIME%
+ 13. System App Restore
* With this option you can restore previously removed system apps.
+ 14. Remove Phone (with auto backup)
* This option will remove phone.apk and TelephonyProvider.apk from /system, without
any extra switches this will backup the removed items.
+ 15. Realtime LOGCAT Monitor 1024x768
* Starts a new command prompt window fit for 1024x768 resolution.
+ 16. Dump LOGCAT to TXT file
* Dumps the LOGCAT output as a TXT file in the Uberizer dir. After the dump has
completed, WinVi editor will open the generated TXT file.
Output file example: LOGCAT_npm702_NOVO7PALADIN_20122511_0202.txt
+ 17. Generate full device and bug report
* Dumps dumpsys, dumpstate, and logcat to a TXT file in the Uberizer dir. After
the dump has completed, WinVi editor will open the generated TXT file.
Output file example: BUGREPORT_npm702_NOVO7PALADIN_20122511_0205.txt
NOTE: This dump can take quite a while. If your device has vibration it will go
off once at the start of the dump and will go off twice when it's completed.
This dump can take up to one minute to complete.
+ 18. Dump DMESG (Diagnostic messages) to TXT
* Dumps out of DMESG in the Uberizer dir and opens the output file in WinVi,
Output file example: DMESG_npm702_NOVO7PALADIN_20122511_0234.txt
+ 19. Fix /data/local permissions
* Needed on some ICS roms when ADB installation fails.
+ 20. Backup and remove batterystats.bin
* Handy for re-calibrating your battery. Batterystats is file that actually follow
the usage of power by android apps. However, some problems conserning calibration
and indication can relate to this file.
+ 21. Backup and remove Unlock Pattern
Simply removes the settings.db so you can use your device again.
+ 22. Enter device's ADB shell
For all the shell ninja's out there
+ 23. Enter device's ADB shell (remountmode)
This remounts data system and root to be read write, consider this option as
browsing under root privileges, be careful what you mod! After you have closed
this shell session, the remounts remain active in the adb session. In other words
if you have problems modding your build prop for example, run this option, close it
and retry, good chance you can now edit system files.
+ 24. Edit init.rc and push back
For pro's only, allows you to modify your init.rc and copy the modified init.rc back
to your device. Handy for developers who are debugging.
+ 25. Edit init.%MODEL%.rc and push back
For pro's only, allows you to modify your init.rc and copy the modified init.rc back
to your device. Handy for developers who are debugging and people who have problems
with touch screen or gsensor on sun5i / a13 models to swap drivers.
+ 26. Clean dalvik-cache
Deletes everything in the dalvik-cache, reboot is required after this procedure, so
the system can rebuilt the cache on boot.

l. Files to SD (extsd)
+ This will write files from \files_to_sd to your device /mnt/extsd or /sdcard

m. Donate to TechKnow
+ How very kind of you to consider!

u. Update Uberizer
+ Connects to TechKnow and downloads the latest version, and installs it over itself.

q. Quit
+ A very common command that should not require explanation. However, quitting the
Uberizer cleans up it's temporary files and shut downs the adb server properly.

r. Reboot device
+ While your device is connected you can reboot it to see if certain mods are accepted
or other testing purposes. Uberizer will play pong with itself until your ADB is back online.

w. Wireless Menu
+ 1. Help and HowTo
* Short intro and HowTo on connecting your device
+ 2. Enable Wireless ADB through wired ADB
* When you are already ADB connected, you can start Wireless mode
+ 3. Disable Wireless ADB
* Wired or wireless, disables Wireless ADB server
+ 4. Wired install of Wireless ADB APP
* Install a ADB APP of choice to your device (2 loaded)
+ 5. Copy Wireless ADB APP to SD
* Prepare a SD card for the Uberizer
+ 6. Connect
* Connect your device to your computer/uberizer to use it. Your IP-address and you can specify
if desired a custom port, default port = 5555, leave the default port empty to use 5555.

x. Install Virtual OldPC 95 to device
+ This will copy the oldpc95 hd image with dos6.22, win2.3, win3.11 and win95, with 17 small games.
Run this image using the slightly modified aDosBox that will be installed with this command. To
enhance the screen quality, go to menu, sdl settings, video settings and select smooth the video.
A reboot is required, if your device is powerful enough you will have no delays. To start Win3.11
or 2.1 or Dos 6.22, on booting the dosbox image hit F5 and select option 5 from the boot menu, or
exit windows to command prompt in the shutdown menu. Run "autoexec" once you are in the prompt and
a helpful menu with the games will appear.


Changelog:
v1.4 (128 functions):
* uberizer various: added: 22. Enter device's ADB shell
* uberizer various: added: 23. Enter device's ADB shell (remountmode)
* uberizer various: added: 24. Edit init.rc and push back
* uberizer various: added: 25. Edit init.%MODEL%.rc and push back
* uberizer various: added: 26. Clean Dalvik-cache
* uberizer root: added x86 root with busybox 1.20
* uberizer root: fixed busybox bugs in root 7 and 9
* uberizer A1X fw: fixed step 3 on the restore function (recovery.img)
* uberizer main: fixed reboot routine
* uberizer main: fixed autodetection
* uberizer backups: fixed a bug in option 10
* uberizer main: added presetup for advanced system specific modifications (upcoming v2.0 feature)


Using the rom_kitchen:
This is the flash kitchen v2 modded to work with A1X IMG files and updated livesuit to 1.0.9, made
easy by some added scripts and automation.

Preparations:
1. a x64 Ubuntu or other linux system
2. a Windows system
3. \rom_kitchen\a10_tools.tar.gz extracted on your linux system
4. a base rom
5. a modkit, a set of files you have modded or wish to add/remove
6. ia32-libs, exe on your x64 ubuntu/linux system "sudo apt-get install ia32-libs"

HowTo:
1. put original.img in the root of the kitchen
2. run the uberizer to extract the original.img
3. mod the files in _input
-recovery.fex (see "Modding the recovery partition" in this document)
-root.fex (see "Modding the root" in this document)
-bootfs.fex (see "Modding the bootfs" in this document)
-system.fex (see "Modding the system partition" in this document)
4. rebuild running uberizer's create image function

Modding the root:
1. Extracting:
tools/split_bootimg.pl _input/root.fex
* this will give you root.fex-kernel the root.fex-ramdisk, check "Modding the ramdisk" in this document for details

2. Rebuilding:
tools/mkbootfs ramdisk | gzip > ramdisk-new.gz
tools/mkbootimg --base 0x40000000 --kernel root.fex-kernel --ramdisk ramdisk-new.gz --cmdline 'console=ttyS0,115200 tw init=/init loglevel=8' -o modded-root.img
this will give you a new file, modded-root.img

Modding the ramdisk:
1. Extracting:
mkdir ramdisk
cd ramdisk
gunzip -c ../root.fex-ramdisk.gz | cpio -i

2. Rebuilding:
check "Modding the root" part 2. in this document

Modding the bootfs:
1. Make some directory:
mkdir bootfs
sudo mount -t ext4 -o loop _input/bootfs.fex /bootfs

2. Edit files in /bootfs

3. Unmount the bootfs
umount bootfs

Modding the recovery partition:
1. Extracting:
tools/split_bootimg.pl ./_input/recovery.fex
rm -rf ramdisk
mkdir ramdisk
cd ramdisk
gunzip -c ../recovery.fex-ramdisk.gz | cpio -i

2. Rebuilding:
*sudo apt-get install ia32-libs
tools/mkbootfs ramdisk | gzip > ramdisk-new.gz
tools/mkbootimg --base 0x40000000 --kernel recovery.fex-kernel --ramdisk ramdisk-new.gz --cmdline 'console=ttyS0,115200 rw init=/init loglevel=8' -o modded-recovery.img

Modding the system partition:
1. Mounting:
sudo mount -t ext4 -o loop system.img /mnt
start modding! (SU permissions required!)
*sudo nautilus (will execute "explorer" with root permission)

2. Unmounting:
sudo umount /mnt

if this fails, you need to use simg2img:

1. convert system IMG (SIMG) to ext4 IMG:
tools/simg2img ./_input/system.fex ./_input/system.img
2. make a system dir for mounting the converted IMG:
mkdir system
3. now mount the IMG to the newly created system directory:
sudo mount -o loop ./_input/system.img system
4. do you modding in the /system dir:
sudo nautilus (will execute "explorer" with root permission)
5. rebuilt the SIMG:
cd tools
sudo ./mkuserimg.sh -s ../system ../new-system.fex ext4 ../tmp 300M
6. unmount the /system dir:
sudo umount system


Troubleshooting / FAQ:
*** Can I use an SD to wireless connect? ***

Yes you can! Go to the Wireless Menu (w) and choose option '5' (Copy Wireless ADB APP to SD), this will copy a wireless ADB
app to your SD (insert your SD in your computer before running this option). After the APP is copied to your SD:
1. Insert the SD in your device
2. Enable WLAN and connect to your home network
3. Start a file browser
4. Locate the SD in your device in the file browser
5. Install one of the copied APKs on your device
6. Start the installed APK
7. Take note of the IP the APP displays, this is your device's IP
8. In the Uberizer, go to the Wireless Menu (w)
9. Select option '6' (Connect to Wireless ADB device)
10.Enter the IP of your device
11.Enter the Port the Wireless ADB is running (leave blank for default port of 5555)
12.Uberizer will automatically rescan for connected devices, and should return the device model


*** Full Market / Google Play Store Function gives error: Error while retrieving information from server. [RH-01] ***

This usually happens when you start the google play store for the first time on the first reboot. Wait a minute, and retry.


*** Livesuit: Install the driver fail! The program will exit ***

if you have problems starting livesuit.exe, and receive the error message "Install the driver fail! The program will exit.":

1. You must connect your device to the system IN "flash mode" before starting the tool. On a MK802 MiniPC, Use a paperclip
to press the "upgrade" mode button located under the LED (small pinhole) WHILE connecting the MK802 to your computer. On
A1x tablets, this can happen when you don't press the volume up button of your device while connecting it to your PC. Shut
down your tablet, press the volume up WHILE connecting the usb to your computer, and retry to start Livesuit again. If you
did held the volume up button, and the device still is not recognized, you need to hold the power button of the A1X for
about 10sec, then retry the procedure.

2. Then, once the tool has started, browse for your IMG file that you want to flash.

3. Reconnect the device using the same method as described in 1. to automatically get the wizard for flashing a ROM, here
you can choose to format the device before flashing or to install the firmware keeping your current apps/data in tact.


*** HowTo Flash the A13 ***

1. Start Livesuit (see TechKnow's Downloads section for this app)

2. Power off the device

3. Press and hold the volume up button

4. Insert the USB connection cable to your computer while holding the volume up button

5. LiveSuit will detect a device being connected and will ask you what to do, you can format the device if you desire.

6. Follow the onscreen instructions


*** The A13-F9 is not recognized or has problems in Livesuit ***

1. Turn off your tablet

2. Press the key combination to start it in the upgrade mode
a. Press the "Vol -" key, then press the "Power" button, hold two buttons at the same time
b. Connect the USB cable to tablet and computer
c. After connecting the USB cable, press the power button 6 times quickly or hold the "Vol -" keys and the "Power" button
for more than 6 seconds (you should get a pop up window if done correctly , if not repeat step 5 from beginning)
d. DON'T release the "Vol -" button till the LiveSuit window pops up
e. You can now release the "Vol -" button
(Note: If you install the driver at this time the pop-up dialog box, the path to point to installation directory UsbDriver
LiveSuit folder, click Next to complete the driver installation prompts).

3. Select the format to force upgrade
Livesuit prompt "force format", click "Yes" (Y). All of the original apps installed will be removed. We highly recommend mandatory format! ! !
Otherwise the update is not complete and may brick! ! !


Special switches:
c = cue fix, fixes cue files so you can easily cut the mp3's inside it using a tool
such as cuecutter. Can remove INDEX00 or INDEX01 entries in a sec for you. Use the
'ui' switch to integrate this feature in XP

i = install drivers, this pre-installs a lot of android drivers to your windows
inf directory so you can connect a device and it's automatically recognized
if the device is supported.

u = uninstall the driver files written to your INF directory.

ui= Uberizer Integrator, intgrates the Uberizer's special features in your system. E.g.
NFO files can viewed, CUE files can be fixed, ZDiR can be called from any directory
in the explorer, etc... currently only tested in XP, might fail using Win7.

n = nfo viewer, displays a black/green proper sized nfo file, use the 'ui' switch to
integrate this feature in XP

o = offline, does not try to scan for a device, this is handy when you use the
uberizer for amm (android multi mod) features to work with APK files for
example.

z = ZDiR, the directory manipulation tool. Generate directory indexes, directories,
filtered indexes and more!

help = a short help on howto connect your device, this documentation however is
recommended for trouble shooting / uberizer usage.

1-7 timer = pauses for the chosen amount of seconds. Since Microsoft stripped the
pause "seconds to pause" feature I needed to get my own timer for this
script to work.

Download:
www.mediafire.com/?6wnvzxmeepc11o1
Note:- (This software work at fine to me. so, share with my all gsm friend)

[TOOL][Multi-Platform] Ultimate Backup Tool v1.3.2 - Full backup without root


With this tool, you can completely backup your device without root or unlocked bootloader.
I have tested it so far only with my Galaxy Nexus, but it should also work with other devices running Android 4.0+.
So you can unlock your bootloader without losing your data.
With version 1.1, not all parts of the program will be downloaded, only the necessary.
The most tools in the "Tools" section are for the Galaxy Nexus, but more devices will follow soon.

Screenshots


Tutorial (thanks to AndyCr15)
http://www.youtube.com/watch?v=Xa0vnq_ce-M">http://www.youtube.com/watch?v=Xa0vnq_ce-M" type="application/x-shockwave-flash" width="425" height="350">
If you use v1.2.2 you don't need to copy the UBT to platform-tools.

German Tutorial:*click*

Download

Windows

Ultimate Backup Tool v1

Ultimate Backup Tool v1.1

Ultimate Backup Tool v1.2

Ultimate Backup Tool v1.2.1

Ultimate Backup Tool v1.2.2

Ultimate Backup Tool v1.3

Ultimate Backup Tool v1.3.1

Ultimate Backup Tool v1.3.2

Mirror link (not always up to date; thanks to chip.de)

Mac OS / Linux

Ultimate Backup Tool v1 (thanks to eyrienne)

Source
*click*

Changelog

v1
  • Initial release

v1.1
  • Added download feature
  • Changeable path for backup
  • Added "Tools" section
  • ADB preloads
  • Added pauses
  • Added ADB and fastboot check
  • changed Window size
  • returning to .bat because some virus scanners have indentified it as malware

v1.2
  • Path will now be saved
  • fixed problem with preloading ADB
  • added version number
  • added Option to backup a single app
  • added CWM for GS2 and GS3
  • fixed Option 2 to install CWM to Verizon

v1.2.1
  • hopefully fixed the bug with backup functions

v1.2.2
  • changed window size
  • spelling mistake corrected
  • advanced ADB and fastboot check (thanks to 2uk3y)
  • some UI adjustments (thanks to 2uk3y)
  • recognizes if it runs on x64 or x86

v1.3
  • full S2 and S3 support
  • german translation (thanks to TheMaurice)
  • added device and version check
  • added notification if backup has been finished
  • added device informations
  • added "Incorrect input" notification to all menus
  • added pop-ups

v1.3.1
  • fixed a bug with pop-ups
  • added pop-ups for backups of a single app
  • fixed a bug with path of backup of a single app

v1.3.2
  • option to capture a problem
  • added package list
  • added Galaxy Note support
  • ADB updated
  • Fastboot updated

Known problems
  • Backup apps doesnt seem to work for Desire HD. It finishes but the backup file is only 1 KB. (thanks to AnumEndzeit)
  • Problems with the HTC One series
  • Problems with Sony devices from 2011

When you have a problem make sure you have correctly installed drivers.

Our little team
  • Gigadroid (Scripting)
  • AlbertoBN (GUI for Windows)
  • Marijuana Legal (GUI for Windows and Mac)
  • TheMaurice (german translation)

Sunday, March 24, 2013

How To Jailbreak (Tethered Jailbreak) iPhone, iPod Touch On iOS 6.1.3 Using Redsn0w

However, devices with an A4 processor can receive a tethered jailbreak , which this tutorial will describe.
Note 1: This guide describes a tethered jailbreak for A4 devices (iPhone 4, iPhone 3GS, iPod touch 4G) using the latest redsn0w version only
Note 2: If you are not on iOS 6.1.3, it is recommended that you DO NOT UPGRADE, since this will ruin any current untethered jailbreaks.
Note 3: Before jailbreaking with this tutorial, it is recommended that you read through it first, so you can become familiar with the steps.
Note 4: if your iPhone is unlocked via Ultrasn0w, you should stay away from iOS 6.1.3 becasue there is no unlock solution available for now.
Compatible Devices:

  • iPhone 4
  • iPhone 3GS
  • iPod Touch 4G

Requirements :
  • Download Redsn0w 0.9.15b3 [Windows / Mac]
  • Download iOS 6.0 for iPhone 4 /3GS, iPod touch 4G

Step 1: Download the original iOS 6.0 from the link provided above.
Step 2: Download Redsn0w 0.9.15b3. Link provided above.
Step 3: Connect your A4 iDevice to your computer.

Step 4: Double click the redsn0w zip file and extract it. Navigate to the extracted redsn0w folder, and launch the redsn0w application.
Note 5: Windows XP and Windows 7 users should run Redsn0w as ‘Administrator’ (right-click on the Redsn0w exe and select ‘Run as an Administrator’)
Step 5: Click on ‘Extras‘, then click on ‘Select IPSW‘. Point redsn0w to the 6.0 firmware, which you downloaded in step 1.


Step 6: Go back to redsn0w’s welcome page, and click the ‘Jailbreak’ button

Step 7: Redsn0w should now start preparing the jailbreak data.

Step 8: Now you may select your jailbreak options – we only recommend that ‘Cydia‘ is selected. Then click ‘Next‘ to continue.

Step 9: Now you will have to put your device into DFU mode. Redsn0w will guide you through the steps below:
  • Hold down the power button (on top of your device)for 3 seconds.
  • Then, without releasing the power button, hold down the home button and keep the two buttons pressed for 10 seconds.
  • Now release the power button, but keep holding the home button down until redsn0w detects your device.


Step 10: After redsn0w detects your device, and if everything has gone successfully, then your device will reboot, and a pineapple logo will appear, indicating a tethered boot. You will now have to wait for the process to complete
Once it is complete, you should see the lock screen on your iOS device but Cydia still missing
Step 11:Launch Redsn0w again and click on “Extras” button Then “Select IPSW” button and Point redsn0w to the 6.0 firmware, which you downloaded in step 1
Step 12: Then click on the Just Boot button.
Step 13: Now you will need to put your device is DFU mode, follow the steps on step 9
If all of the above went according to plan, then congratulations! You have jailbroken your A4 device. In order to boot your device from now on, you will need to connect it to your computer, open redsn0w, then go to ‘Extras’, and click on ‘Just Boot’


[video] on how to jailbreak A4 devices on iOS 6.1.3


http://www.youtube.com/watch?v=HXlzL...layer_embedded

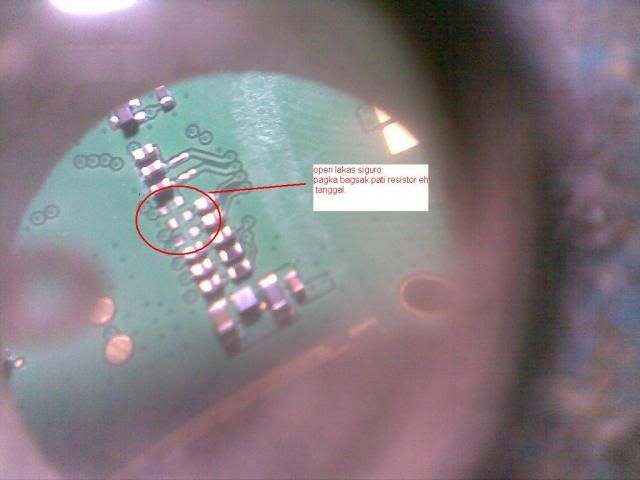
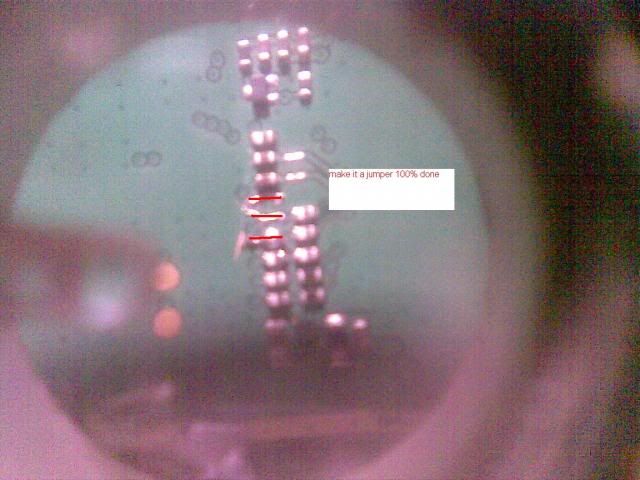
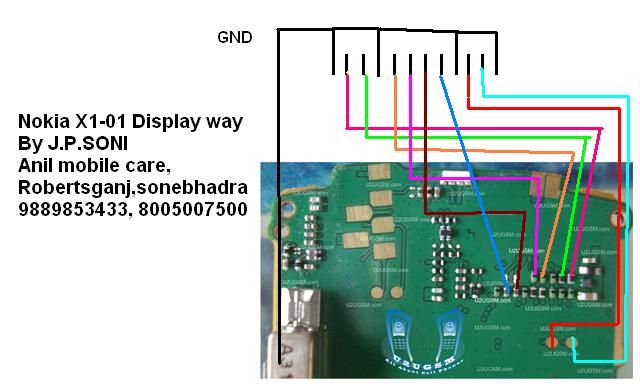
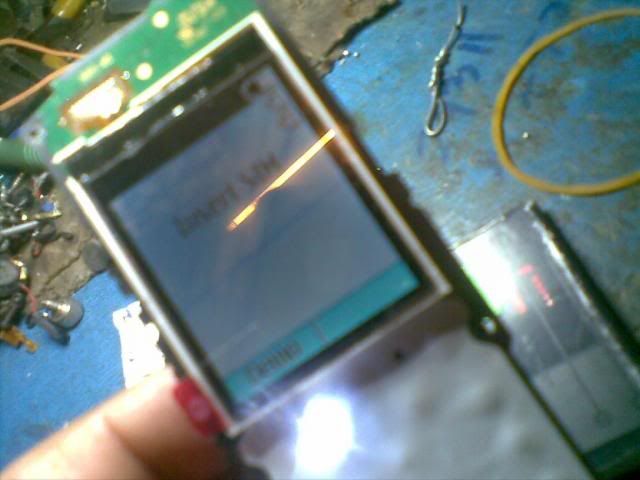
Nokia X1-01 No Power Basag Lcd & Resistors Lcd Ways Done.

HISTORY:

No power basag lcd try to selftest mxkey finding "LCD FAILED"


ACTION TAKEN:

Replace new LCD no luck,i try to trace lcd ways viola i got it.


FINISH & TEST:


Thanks For ViewinG

blackberry 9800 china keypad 7 , 8 , 9 not work solve tricks pic inside

model; blackberry 9800 china

problem; keypad 7,8,9 not working


problem solve

Repair Boot LG Optimus 3D,Cube, BY USB Free!!!

Tutorial how repair boot Optimus 3D by USB!!
No need to explain much, the steps are the same as I9250 to repair boot..

1. Connect phone without battery,phone detect OMAP4430
2. Install driver omap "inside folder have drivers"(omap4boot-for_optimus-v1.22 modified by XcachorroX®\usb_drv_windows)
3. Run file start_fastboot.bat and follow the instructions,after this you see logo LG in phone,
4. now enter downlaod mode "connect phone without battery press volumen+ and connect cable,now enter download mode,run SmartFlashTool_External.exe and open folder BOOTV21E select BOOTV21E_AP.bin & BOOTV21E_CP.fls after press Start Button.
5. After all this steps you can write any firmware to phone,enter download mode " connect phone without battery press volumen+ and connect cable,open LGtool select model and select firmware......and rest you know all there is no need to explain

PS: Original Solution is from wkpark but not have in list P925G "roger version" i edit soft and add on list this model and work with same loader/u_boot P920 and correct some errors in the procedure to repair.

/images of the procedure/
1


2


3


4


files:
SmartFlashTool_External+BOOTV21E files.rar
omap4boot-for_optimus-v1.22 modified by XcachorroX®.rar

[Root] step by step Manual i9082 (L) Galaxy GRAND

How to Root I9082 / I9082L -
STEP BY STEP rooting manual for GSM-Hosting users

Just follow this simple steps:


1. Step

- Download Samsung USB drivers ----> Click HERE
- Download ODIN 3.04 from ----> Click HERE
- Download i8092 recovery image prerooted ----> Click HERE
- Download SuperSu Last version ----> Click HERE


2. Step

- Turn off phone, then switch to download mode:
press together [volume down]+[home button]+[power button] (all at once),
press [volume up] for comfirm download mode.
- Connect usb cable, install drivers.


3. Step

- Run Odin 3.04, ticked 2 option F.reset times+auto reboot,
- Extract CWM-touch_i9082_chotu.tar.zip !Select PDA and browse to where you have extracted CWM-touch_i9082_chotu.tar.md5
and select it


4. Step

- Odin should show device under 1 of ID:COM port.(if this not happends repeat from STEP 2)
- Press START.
- Phone should power on after flashing complete.


5. Step - ROOTING:

- Copy Downloaded SUperSU to externel sdcard (NOT INTERNAL ! )
- Power off your phone, after press [Vol up] + [Power] + [Home button] (all at once)
- SelectInstall zip from sdcard --->choose zip from sdcard ---> scroll down and select Fix Recovery.zip and
again choose zip from sdcard and flash UPDATE-SuperSU-v1.05.zip


Done ! And you are ready to go

thanks goes to chotu.

[Root] step by step Manual i9105 (P) Galaxy S2 Plus

How to Root I9105 / I9105P Galaxy2 PLUS -
STEP BY STEP rooting manual for GSM-Hosting users

Just follow this simple steps:


1. Step

- Download Samsung USB drivers ----> Click HERE
- Download ODIN 3.04 from ----> Click HERE
- Download CWMtouch-i9105_chotu.tar.md5.zip recovery image from here ------> Click HERE!
for other type fw (Indian) download this recovery image ---> Click HERE!
- Download SuperSu Last version ----> Click HERE

2. Step

- Turn off phone, then switch to download mode:
press together [volume down]+[home button]+[power button] (all at once),
press [volume up] for comfirm download mode.
- Connect usb cable, install drivers.

3. Step

- Run Odin 3.04, ticked 2 option F.reset times+auto reboot,
- Extract CWM-touch_i9082_chotu.tar.zip !Select PDA and browse to where you have extracted CWM-touch_i9105_chotu.tar.md5 or CWM-touch_i9105_Indian_chotu.tar.md5
and select it

4. Step

- Odin should show device under 1 of ID:COM port.(if this not happends repeat from STEP 2)
- Press START.
- Phone should power on after flashing complete.


5. Step - ROOTING:

- Copy Downloaded SUperSU to externel sdcard (NOT INTERNAL ! )
- Power off your phone, after press [Vol up] + [Power] + [Home button] (all at once)
- SelectInstall zip from sdcard --->choose zip from sdcard ---> scroll down and select Fix Recovery.zip and
again choose zip from sdcard and flash UPDATE-SuperSU-v1.05.zip

Done ! And you are ready to go

thanks goes to chotu.

[Driver]Latest version SAMSUNG USB Drivers for Mobile Phones

Tired downloading/installing KIES only for last drivers?
SO this thread for you


Download and Install Samsung's latest USB drivers & ADB Interface: February 2013!


SAMSUNG USB Drivers for Mobile Phones (x86 & x64) v1.5.18.0 ===> Click HERE

Step by step installation manual:
- Uninstall previous version from control panel and reboot pc
- Install new Drivers and again reboot pc
- Turn ON “USB debugging” mode on your Android device
- Connect you phone and enjoy


Here Samsung Android ADB interface Drivers from MS:
DOWNLOAD Driver v2.9.507.0 ===> Click HERE

[TUTORIAL]How to root\install CWM Symphony W60

Here is the full procedure with video tutorial


Symphony W60

Stock ROM


Custom ROM


Tools & Drivers


Thanks xda for this tutorial.