Thursday, May 30, 2013

[NEW GAME] Incredible Jack - a classic platformer with flawless controls

Hi everyone!

Let me introduce a new game for iPhone/iPod/iPad.
Incredible Jack is an exciting platformer where you will be helping Jack save his family from evil monsters.

- 37 levels in 7 worlds
- 7 vicious bosses
- Lots of bonuses and secret rooms
- Extremely convenient controls (something you seldom find in platformers for iOS)


Video:
http://www.youtube.com/watch?v=KzlUmqaIADU

App Store Link:
https://itunes.apple.com/us/app/incr...ck/id586208591

nokia asha 300 touch screen not working done by tricks


Tuesday, May 28, 2013

Android Mobile Secret Codes


(1) *#*#4636#*#* - this code Shows Phone information, Battery information, Battery history and Usage statistics etc


(2) *#*#8255#*#* - this code Show GTalk service monitor


(3) *#*#1111#*#* -this code show Service Mode


(4) *#*#232331#*#* -this code use s Bluetooth test


(5) *#*#3264#*#* - this code show RAM version


(6) *#*#0588#*#* - this code show Proximity sensor test


(7) *#*#2664#*#* - this code show Touch screen test


(8) *#*#0842#*#* - this code show Vibration test


Android 2.3 Mobile Secret codes


(1) *#*#0*#*#* this code use screen test menu


(2) *#0011# show to network mode/cell info/power info hidden menu


(3) *#*#4636#*#* sow to battery and other general setttings like GSM/CDMA


(4) *#*#8255#*#* for Gtalk service monitor


(5) *#*#7780#*#* for factory data reset


(6) *#*#34971539#*#* for information about phone camera (be very careful hitting options here)


(7) *#*#7594#*#* change the "Power" button action in your phone.


(8) *#*#197328640#*#* service mode


(9) *#197238640# service mode


(10) *#0*# testing mode


(11) *#1234# display phones current firmware


(12) *#*#1472365#*#* gps test (work on 2.2)


(13) *#0011# network mode/cell info/power info


(14) *#*#0*#*#* screen test menu


(15) *#7465625# engineering mode


(16) *#3214789650# gps service menu for JP3 fw


(17) *#9900# Sysdump screen.. way to dump ram and other logs to sd card


(18) *2767*3855# FACTORY DATA WIPE AND internal SD RESET as soon as you enter # use only if you want wipe your phone


(19) *#*#273283*255*663282*#*#* Opens a File copy screen where you can backup your media files


Note: We will not be responsible for any damage of your phone,no will be liable for any damage


Touchmate U-Tab (TM-MID785) Pattern Lock Done Thru Flashing

share ko lang po mga boss Touchmate U-Tab (TM-MID785) Pattern Lock Done Thru Flashing

actually u cant reset it but u can flash it with TM-MID760 flash file and it will suit ur model TM-MID785...below is the website u can download the software with flasher.

download here:
Touchmate

Once downloaded the file
steps:
1. switch off ur tablet by long press power button
2. open rk768 folder and open rockchip tool
3. for english version bottom left buttom and tick the second option
4. now select the .img file
5. this is very important how we connect the tablet to the computer so the tool recogonize it as downloading mode....press and hold menu key then connect usb cable then immediately press power button 5 to 6 or 10 times quickly..if u r running win xp then it will ask for driver (drivers are located in rk768 folder rockusb) select the driver and install it now u can see green light on rockchip tool saying connected device no.1...it means u r connected in download mode successfully...if u fail to connect dont worry try 1 or 2 times the same procedure it will work for sure until u have and hardware issue.
6. that's it now press upgrade button and wait till process complete now ur tab should work.

Note: U have to select the usb driver manually hope all know that method...if not please search it on google i dont have any pics right now.


Done...

Saturday, May 18, 2013

Recover SMS, Contacts, Call History directly from iPhone 4S/5

Wondershare Dr.Fone - iPhone iPad iPod Data Recovery

• Recover 7 types of deleted data directly from iPhone 4S/5, including messages, contacts, notes, etc.
• Retrieve 12 types of data directly from iPhone 4/3GS, iPad 1 & iPod touch 4 without iTunes backup, even if the device is crashed, smashed or broken.
• Regain lost data from your iTunes backup for any iOS device due to device loss, jailbreak, iOS upgrade or factory settings restore.

Free Download: iOS Data Recovery >

More Info: How to recover iSO Data directly?

[GUIDE]/How to fix Safemode Loop and 90% of Problems

ever seen this


does it keep coming back dont know how to fix it

I can't tell you all how many times I see this thread (I swear half my thanks comes from answering these types of questions
"apps crash"
"I installed something from Cydia now I'm in safe mode"
"mail app crashes"
"phone app crashes" ect. ect. ect.


if you ever run into a problem and you dont remember the last thing you installed, or you have any sort of bug this is the first method to figure out what it is.
I am not showing you anything new but I am sick of answering the same question over and over.
any who here goes

open SbSettings


then tap more
then scroll down to mobile substrate addons


proceed to turn ALL you mobile substrate addons OFF


(mine are on)

exit SbSettings and your phone will re spring

once it has resprung check to see if your problem is gone (if its still there restore)
if your problem is gone go back to Sbsettings / More / Mobile Substrate addons
turn them back on ONE by ONE
exit Sb settings after turning each one back on
your phone will respring each time you turn something back on and exit SbSettings

each time your phone resprings test to see if the problem has come back

proceed with this method until the problem comes back
once the problem comes back you know the last thing you enabled is causing the conflict and causing you to enter safe mode or crash or what ever your problem is.

hope this is helpful.

You can then do some further investigation
Your suspect mobile substrate add on may work perfectly as intended but is conflicting with a different ms addon
Go back to sb settings and turn everything OFF except for the suspect ms addon
Exit sb settings and let you phone respring
If the problem is still there it confirms that there is defiantly something wrong with the tweak in question
How ever if the problem is gone
Go back to sb settings and turn your ms addons on one by one again until the problem comes back

Example : I'm pretty sure Quasar for iPad is not compatible with Dream board or doesn't work in dream board
If you were running a dream theam and installed quasar. then used the above method you would come to the conclusion that quasar was broken. When in fact after further investigation it is not broken but rather not compatible

Just more food for thought

THANKS FOR VIEWING.....

Safe -- The Complete Guide to Updating to iOS 5

iOS 5 is finally here of your iPhone, iPod touch, or iPad. Now what? With the flurry of features and updates being dropped today and yesterday the whole thing can be a confusing mess. Here's the best way to get up to speed and enjoy Apple's latest iOS.

While you're getting ready to update, remember that Apple's servers are getting hammered right now with downloads, people registering for iCloud and iOS 5 updates. If you're getting server error 3200 while attempting to update, or if your downloads are taking entirely too long for you, just relax. As traffic subsides the errors and download issues will go away and you'll be able to add images to Photo Stream in no time.

Update your Mac or PC
Before you update your iPhone, you'll want to grab a few updates. First update iTunes to 10.5. You'll need that update in order to actually installed iOS 5 on your device. For iCloud features, update Lion to 10.7.2 and iPhoto to 9.2. Lion and iTunes can be updated using Software Update, while iPhoto requires you to use the Mac App Store. If you're on a Windows machine, you need to download the iCloud control panel. Or you can skip all that and download the updates manually with the links below. And, this should go without saying BUT we're saying it 'cause you might need us to: Back everything up first!

Lion 10.7.2
iPhoto 9.2
iTunes 10.5
iCloud control panel for Windows


iOS 5 update
Before hitting the Check for Update button, you'll want to backup. You can manually force your iOS device to backup when you plug it in. Right-click on your device in the left-hand column in iTunes. Select Backup. Let iTunes do its magic before going forward. If something goes horribly wrong during the update, you'll thank me for this.

(This would be a good time to do a backup of your whole machine too.)


Now lets download the iOS 5 update. You can manually download the update here, or you can just plug your iOS device into iTunes and Check for Update. At this point you have to make a decision. Do you want to just do the normal update, or go for the clean install with Restore.

The Check for Update install will download iOS 5 to your machine, your device will restart and the installation will begin. It might take a while to download the update, but the install should only take about 15-20 minutes. After a few restarts your device will be ready to go.

The Restore button will completely erase your device, apply the update, then sync all your backed up settings, apps, photos, and music to you device. This is helpful if you're having problems with your device or you just want the peace of mind that a clean install gives. To update this way, just hit the Restore button and iOS 5 will be downloaded like above. Because you've completely erased your device, the initial sync could take hours depending on the amount of apps and music you have on your device. What's nice is that as long as your device is plugged into iTunes, with iOS 5 you can continue the set up without interrupting the sync.


iCloud


While you're updating your iOS device, head to System Preferences and click on the iCloud preference to set up your free account.


If you're new to Apple's cloud services, use your Apple ID (the ID you use to buy music and apps from iTunes and the App Store) to sign in or set up a new one. You'll need iCloud for some of Apple's new iOS features like Photo Stream, Find my Mac, cloud backup of your iOS device, and Find My Friend. After sign up, you'll use the iCloud system preference to choose which features you want to utilize.
If you're migrating from from MobileMe, it'll take a few minutes to migrate to the new service. Whether you move to iCloud or not, Apple intends on killing off iDisk, iWeb pages, and its online galleries. Fortunately, you have until June 30, 2012 to pull your items off of iDisk and updating to iCloud won't stop you from accessing the online drive. So you might as well update. It's free.
iOS device set up
Once your iPhone finishes the update, you'll be presented with the setup-assistant walkthrough. You can now set up your iPhone without it being connected to your computer.


During the setup you'll first be asked if you want to set up Location Services. This allows your apps to access your location using your device's GPS feature and any location-logged Wi-Fi locations. Next, If you're at home or work, you can add your Wi-Fi network to your device.


If you decided to just update your iPhone instead of restore, skip the next two paragraphs, If you're one of the brave souls that decided to completely erase your device before updating with the Restore button, your device will now ask if you want to set up a new iPhone/iPad/iPod touch or restore from an iCloud or iTunes backup. Unless you've updated to iOS 5 previously and this is a reinstall, you probably don't have a back up saved to iCloud. Choose Restore from iTunes and if it isn't already, connect your device to iTunes.

You'll be presented with the latest backup of your iPhone in iTunes. Click on continue restore from that backup. Your device will be set up for restore and will restart after a few minutes. Going forward, you'll be able to restore your iOS device from iCloud. So when you're on vacation and your iPhone takes a dump on you, you'll be ready to restore without a computer around.


At this point you'll be asked to add your Apple ID information. This information is used to set up iTunes, the App Store, and iCloud.


Here is the big one, iCloud. If you made an account earlier, just tap, Use iCloud. You can adjust your iCloud settings on your device by heading to Settings>iCloud. There you can enable and disable features. Which is helpful if Photo Stream starts uploading photos you'd rather not share.


The set up assistant will also ask if you want to utilize Cloud Backup. I'd say hold off on that for a few days. iCloud is going to be busy with new accounts. Instead you should continue to back up to your computer for now. You have a few more choices to make and you're done. I highly recommend using Find my iPhone. If your device is lost or stolen, this is a killer feature.

Your iOS device should now be ready to enjoy all the new features of iOS 5.
Once your iPhone finishes the update, you'll be presented with the setup-assistant walkthrough. You can now set up your iPhone without it being connected to your computer

How to back up your iOS device in five minutes via iCloud

How to back up your iOS device in five minutes via iCloud


If you've invested in an iPhone, iPad, or iPod Touch, you probably keep some very important information on your device that you won't want to lose. What would happen to your files, photos, and everything else on your iOS device if it were lost, stolen, or severely damaged?
The best way to safeguard your Apple mobile device is to back up your data. With iOS, you have two simple options for backing up: Use iCloud or use iTunes. This article explains how to back up using iCloud.

iCloud is Apple's own cloud-based storage and backup solution. It comes included with your device, so it's free to use (for up to 5GB worth of data, as I'll explain in more detail below). You should be able to progress through the following instructions for backing up using iCloud in about five minutes. Below the step-by-step instructions, you'll also find a quick overview of how to restore your device using iCloud, should you need to. As well as that, I've included a list of things that do get backed up using this method, along with a list of things that don't.
How to back up iPhone and iPad using iCloud

  • Go to Settings > iCloud > Storage & Backup.
  • Under Backup, turn on the switch for iCloud Backup.

  • Go back one screen and turn on or off the data you want backed up from the selections. You'll notice that not all your apps appear here, only the pre-installed Apple apps. At this stage, you can consider yourself finished with the backup if don't want to back up anything else on your phone. If you're finished, skip ahead to the final step in this section (“Connect your iPhone or iPad to a Wi-Fi signal”). If you do want to back up more of your non-Apple apps, continue through the rest of the following steps.

  • Scroll all the way down to Storage & Backup, and tap it.
  • Choose the third choice shown, Manage Storage.
  • Under the heading Backups, select the entry for your phone. Mine is simply named "Jill's Phone." The resulting page may take a moment or two to load.
  • You should now be on a page called Info. Under the heading Backup Options, you'll see a list of the top five storage-using apps, plus another button labelled "Show All Apps." Press Show All Apps, and you can now choose which items you want to back up. You should back up apps that contain important information or files, as well as apps that you have taken a lot of time to customise. I personally wouldn't back up most apps that use a cloud service because all the app data you care about is already being hosted by the provider – not locally on your phone.

  • As you decide which of your apps you don't want to back up, toggle those to "off." A red button reading "Turn Off & Delete" will appear. If you click it, you'll still have the app and its data locally on your iPhone. All you're "deleting" is the data from iCloud's backup. At the bottom of the screen, you'll see how much space you have available. Apple gives you 5GB of iCloud storage free. Of course, if you want to back up more, you can pay Apple for extra storage space, starting at £14 a year for an additional 10GB.
  • Connect your iPhone or iPad to a Wi-Fi signal, plug it into a power outlet, and leave the screen locked (in other words, don't use the device). Your iPhone or iPad will automatically backup once a day when it meets these three conditions. You can also manually initiate a backup to iCloud by connecting your iPhone or iPad to a Wi-Fi signal, and selecting Back Up Now under Settings > iCloud > Storage & Backup.
How to restore iPhone and iPad using iCloud

  • When launching a new (or newly wiped) iOS device, a Setup Assistant will automatically ask if you want to "Restore from iCloud Backup." Choose this option to restore your old iPhone or iPad's data, apps and settings.
  • Enter your iCloud username and password.
  • You'll see the three most recent backups to choose from. In most cases, you'll want the latest one.
  • From this point, the iPhone or iPad will pretty much do the rest. Enter passwords when prompted, and don't mess with your phone while that progress bar is still doing its thing. iCloud will restore your apps to the version you had rather than the most up-to-date version, unless the previously stored version is no longer available, in which case it defaults to the most recent.
What will be backed up

  • Music purchased through iTunes (but not in all countries).
  • Apps.
  • Books purchased through iTunes.
  • Photos in the Camera Roll.
  • Videos in the Camera Roll.
  • Notes in the Notes app.
  • Device settings (for example, Phone Favourites, Wallpaper, and Mail, Contacts, Calendar accounts).
  • App data.
  • Home screen and app organisation.
  • Messages (iMessage, SMS, and MMS).
  • Ringtones.
What won't be backed up

  • Media files synced from your computer aren't backed up, but can be restored by syncing with iTunes.
  • Apps, books, and music that have subsequently been removed from the App Store, iTunes Store, and iBookstore since you downloaded or purchased them

[Guide]--iPhone Backup with iTunes using WiFi & USB Cable

iOS: How to back up

Summary

This article describes how to back up your iPhone, iPad, or iPod touch using iCloud or iTunes.

Products Affected

iPad, iPhone, iPod touch

iCloud and iTunes can back up most data on your iPhone, iPad, or iPod touch.
Backed-up information includes purchased music, TV shows, apps, and books*; photos and video in the Camera Roll; device settings (for example, Phone Favorites, Wallpaper, and Mail, Contacts, Calendar accounts); app data; Home screen and app organization; Messages (iMessage, SMS, and MMS), ringtones, and more. Media files synced from your computer aren’t backed up, but can be restored by syncing with iTunes.
* Backup of purchased music is not available in all countries. Backup of purchased TV shows occurs only in the United States. Previous purchases may not be restored if they are no longer in the iTunes Store, App Store, or iBookstore.
Collapse All Sections | Expand All Sections

iCloud


How to back up

iCloud automatically backs up the most important data on your iOS 5 device. After you have enabled Backup on your iPhone, iPad, or iPod touch in Settings > iCloud > Backup & Storage, it will run on a daily basis as long as your device is:

  • Connected to the Internet over Wi-Fi
  • Connected to a power source
  • Screen locked

You can also back up manually whenever your device is connected to the Internet over Wi-Fi by choosing Back Up Now from Settings > iCloud > Storage & Backup.

To learn more about what is backed up, see the iCloud: Backup and Restore Overview article.

How to restore from a backup

When you go through Setup Assistant on a new iOS 5 device, choose "Restore from iCloud Backup" and enter your iCloud account and password. You will see the three most recent backups for each of the devices on which you enabled Backup. Choose from which backup to restore.

After your device restarts, your settings and accounts are restored and Backup starts downloading your purchased music, TV shows, apps, books, Camera Roll, and other content*. You may be prompted to enter the passwords for all accounts enabled on your device.
A progress bar will appear underneath the apps that are being downloaded. To prioritize the restore of a specific app, tap its icon. Restore will attempt to download the same version of the app that you had installed previously. If that version is no longer available, the latest version of the app will be restored.

To check if the restore is complete, go to Settings > iCloud > Storage & Backup. Complete the setup assistant after erasing your device (by going to Settings > General > Reset > Erase All Content and Settings) or after starting your new device. When prompted to set up as new or to restore from previous backup, choose to restore from iCloud backup. Then enter your AppleID and password.


iTunes

How to back up

iTunes can create backups of your iOS device when you:

  • Sync with iTunes (disabled if you have iCloud backup turned on)
  • Right-click (or Control-click) the iOS device in iTunes under Devices and choose Back Up

Use these steps to manually back up your iOS device using iTunes:

  1. Connect your iOS device to a computer with the latest version of iTunes installed
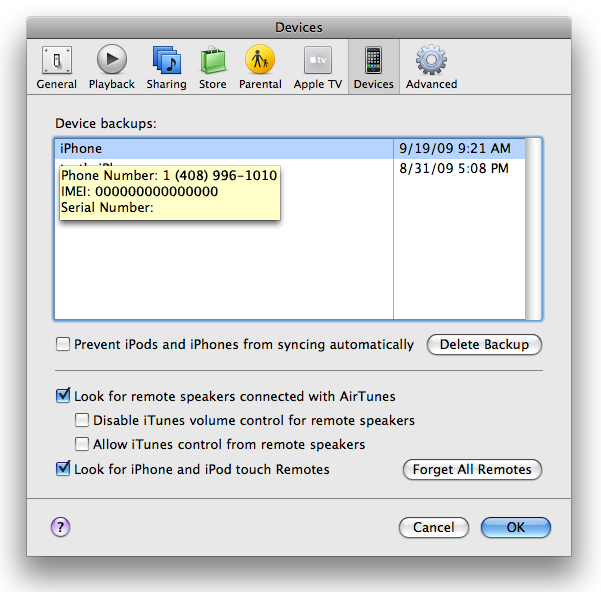
  2. Select your iOS device in iTunes under Devices
  3. Right-click (or Control-click) the device and select Back Up

iOS device backups preserve your settings, the Camera Roll (or Saved Pictures), and other important data. Learn more about what is stored in a backup.

How to restore from a backup

To restore information from a backup, use one of the following methods after connecting your iOS device to the computer with which you normally sync:

  • Right-click (or Control-click) the device and choose Restore from Backup
  • If you have a new phone, you can connect to iTunes and it will prompt to restore from your backup


Additional Information

iTunes and iOS do not support installing backups of newer versions of iOS onto devices using earlier versions of iOS.
iTunes will not back up automatically if you are using iCloud.
Have a new iOS device and need to move your previous backup onto it? Follow the steps in How to transfer your backup from one iOS device to a new device.
 
 
iTunes: About iOS backups

Summary

iTunes can back up your settings, Messages, Camera Roll, documents, saved games, and other data. Backups do not contain content synced to the device, such as movies, music, podcasts, and apps.


Products Affected

iPad, iPhone, iPod touch, iTunes, iTunes 10 for Mac, iTunes 10 for Windows

If an iOS device is protected with a passcode, iTunes prompts you to enter the passcode when you connect to your computer. Once you successfully enter the passcode, iTunes will recognize that device as authorized and you will not need your passcode to back up or sync. When restoring from an iOS 4 (or later) backup, if the device had a passcode set, iTunes will ask if you want to set a passcode (and remind you that you had protected your device with a passcode). iTunes will not ask you to set a passcode when restoring from iOS 3.x and prior backups.

iTunes and encrypted backups

In the iTunes Summary screen, select "Encrypt iPhone backup" if you want to encrypt the information stored on your computer when iTunes makes a backup. Encrypted backups are indicated by a padlock icon, and a password is required to restore the information to iPhone. You may want to write down the password for your backup and store it in a safe place. If you use a Mac, when you set a password you can select to store the password in the keychain. With iOS 4 and later, you can transfer the iOS keychain backup to a new device if you encrypt the backup.
Warning: If you encrypt an iPhone backup in iTunes and then forget your password, you will not be able to restore from backup and your data will be unrecoverable. If you forget the password, you can continue to back up and use the device, however you will not be able to restore the encrypted backup to any device without the password. You do not need to enter the password for your backup each time you back up or sync.
If you cannot remember the password and want to start again, you must perform a full software restore and when iTunes prompts you to select the backup from which to restore, choose set up as a new device.

Where iTunes backups are stored on your computer

The folder where your backup data are stored varies depending on the computer's operating system. Make sure the backup folder is included in your periodic data-backup routine.
iTunes places the backup files in the following places:

  • Mac: ~/Library/Application Support/MobileSync/Backup/
  • Windows XP: \Documents and Settings\(username)\Application Data\Apple Computer\MobileSync\Backup\
    Note: To quickly access the Application Data folder, click Start, and choose Run. Type %appdata% and click OK.
  • Windows Vista and Windows 7: \Users\(username)\AppData\Roaming\Apple Computer\MobileSync\Backup\
    Note: To quickly access the AppData folder, click Start. In the search bar, type %appdata% and press the Return key.


Deleting a backup in iTunes

If you want to delete a backup created by iTunes, follow these steps:

  1. Open iTunes Preferences:
    • Windows: Choose Edit > Preferences
    • Mac: Choose iTunes > Preferences
  2. Click Devices (the iOS device does not need to be connected).
  3. iTunes will show the phone number, IMEI, and serial number of the backed up iPhone when you position your mouse pointer over a backup (iTunes shows only the serial number for iPad and iPod touch). Use this to locate the backup for the iOS device you want to delete. Select the backup you want to remove and click Delete Backup.
  4. Confirm you wish to remove the selected backup by clicking Delete Backup.
  5. Click OK to close the iTunes Preferences Window.

Note: Backups that are listed with a Date and Time stamp in the backup name were created by restoring the iOS device.
iTunes will back up the following information


  • Contacts* and Contact Favorites (regularly sync contacts to a computer or cloud service such as iCloud to back them up).
  • App Store Application data including in-app purchases (except the Application itself, its tmp and Caches folder).
  • Application settings, preferences, and data, including documents.
  • Autofill for webpages.
  • CalDAV and subscribed calendar accounts.
  • Calendar accounts.
  • Calendar events.
  • Call history.
  • Camera Roll (Photos, screenshots, images saved, and videos taken. Videos greater than 2 GB are backed up with iOS 4.0 and later.)
    Note: For devices without a camera, Camera Roll is called Saved Photos.
  • Game Center account.
  • Home screen arrangement.
  • In-app purchases.
  • Keychain (this includes email account passwords, Wi-Fi passwords, and passwords you enter into websites and some other applications. If you encrypt the backup with iOS 4 and later, you can transfer the keychain information to the new device. With an unencrypted backup, you can restore the keychain only to the same iOS device. If you are restoring to a new device with an unencrypted backup, you will need to enter these passwords again.)
  • List of External Sync Sources (Mobile Me, Exchange ActiveSync).
  • Location service preferences for apps and websites you have allowed to use your location.
  • Mail accounts (mail messages are not backed up).
  • Managed Configurations/Profiles. When restoring a backup to a different device, all settings related to the configuration profiles will not be restored (accounts, restrictions, or anything else that can be specified through a configuration profile). Note that accounts and settings that are not associated with a configuration profile will still be restored.
  • Map bookmarks, recent searches, and the current location displayed in Maps.
  • Microsoft Exchange account configurations.
  • Network settings (saved Wi-Fi hotspots, VPN settings, network preferences).
  • Nike + iPod saved workouts and settings.
  • Notes.
  • Offline web application cache/database.
  • Paired Bluetooth devices (which can only be used if restored to the same phone that did the backup).
  • Safari bookmarks, cookies, history, offline data, and currently open pages.
  • Saved suggestion corrections (these are saved automatically as you reject suggested corrections).
  • Messages (iMessage and carrier SMS or MMS pictures and videos).
  • Trusted hosts that have certificates that cannot be verified.
  • Voice memos.
  • Voicemail token. (This is not the voicemail password, but is used for validation when connecting. This is only restored to a phone with the same phone number on the SIM card).
  • Wallpapers.
  • Web clips.
  • YouTube bookmarks and history.

* Your contacts are part of the backup to preserve recent calls and favorites lists. Back up your contacts to a supported personal information manager (PIM), iCloud, or another cloud-based service to avoid any potential contact data loss.
  
iCloud: Backup and restore overview

Summary

This article outlines how iCloud Backup works, what data is backed up, and how Backup uses your iCloud storage.

Products Affected

iCloud


Backup overview
iCloud automatically backs up the most important data on your iOS 5 device. Once you have enabled Backup on your iPhone, iPad, or iPod touch in Settings > iCloud > Backup & Storage, it will run on a daily basis as long as your device:

  • is connected to Internet over Wi-Fi
  • is connected to a power source
  • has the screen locked

You can also back up manually whenever your device is connected to Internet over Wi-Fi by choosing Back Up Now from Settings > iCloud > Storage & Backup.

What is backed up
You get unlimited free storage for:

  • Purchased music, movies, TV shows, apps, and booksNotes: Backup of purchased music is not available in all countries. Backups of purchased movies and TV shows are U.S. only. Previous purchases may not be restored if they are no longer in the iTunes Store, App Store, or iBookstore.
    Some previously purchased movies may not be available in iTunes in the Cloud. These movies will indicate that they are not available in iTunes in the Cloud on their product details page in the iTunes Store. Previous purchases may be unavailable if they have been refunded or are no longer available in the iTunes Store, App Store, or iBookstore.


You get 5GB of free iCloud storage for:

  • Photos and videos in the Camera Roll
  • Device settings (for example: Phone Favorites, Wallpaper, and Mail, Contacts, Calendar accounts)
  • App data
  • Home screen and app organization
  • Messages (iMessage, SMS, and MMS)
  • Ringtones


You can select which applications back up their data and see how much storage space each application is using:

  1. On your Home Screen, tap Settings
  2. Tap iCloud
  3. Tap Storage & Backup
  4. Tap Manage Storage
  5. Select the device you want to manage


If you need more iCloud storage, you can purchase additional iCloud storage from your iOS device, Mac, or PC.
The following items are not backed up to iCloud. You can sync these items with a computer using iTunes:

  • Music, movies and TV shows not purchased from the iTunes Store
  • Podcasts and audio books
  • Photos that were originally synced from your computer


How content is restored to a new device

When you go through Setup Assistant on a new iOS 5 device, choose "Restore from iCloud Backup" and enter your iCloud account and password. You will see the three most recent backups for each of the devices on which you enabled Backup. Choose which backup to restore from.

After your device restarts, your settings and accounts are restored and Backup starts downloading your purchased music, movies, TV shows, apps, books, Camera Roll, and other content.
Note: You may be prompted to enter the passwords for all accounts enabled on your device. You may also be prompted to enter the password for for any iTunes, iBookstore and App Store accounts for which iCloud Backup is attempting to restore content.

A progress bar will appear underneath the apps that are being downloaded. To prioritize the restore of a specific app, tap its icon. Restore will attempt to download the same version of the app that you had installed previously. If that version is no longer available, the latest version of the app will be restored.

If you are using iTunes Match (U.S. only), you can download any of your songs, albums, or playlist from iCloud after the restore is complete.

To check if the restore is complete, go to Settings > iCloud > Storage & Backup.

Troubleshooting Backup

  • For information about error messages that appear when your device is trying to back up your data, read this article.
  • For information about error messages that appear when you are trying to restore to a new device, read this article.


Apple " Iphone 5 " Discussion Thread


The iPhone 5

is a touchscreen-based smartphone developed by Apple Inc.. It is the sixth generation of the iPhone and succeeds the iPhone 4S. The phone is a slimmer, lighter model that introduces a higher-resolution, 4-inch screen to the series with 16:9 widescreen aspect ratio. The phone also includes a custom-designed ARMv7 processor called the Apple A6, an update to Apple's mobile operating system known as iOS 6, and support for LTE.
Apple held an event to formally introduce the phone on September 12, 2012. Apple began taking pre-orders on September 14, 2012 and over two million were received within 24 hours. Initial demand for the iPhone 5 exceeded the supply available at launch on September 21, 2012, and has been described by Apple as "extraordinary", with pre-orders having sold twenty times faster than its predecessors. After the launch of the device, Samsung filed a lawsuit against Apple, claiming that the iPhone 5 infringes eight of its patents.
While reception to the iPhone 5 has been generally positive, the new Maps application featured on iOS 6 was negatively received and was reported to contain many serious errors. Consumers and reviewers have noted hardware issues, such as an unintended purple hue in photos taken by the iPhone 5, consumer reports of the coating chipping off, and the presence of light leaks on white variants of the device. Incompatibilities with LTE networks in some regions have been noted.


Specification and features

DESIGN

Smart phone
OS:
iOS ( 6 )
Dimensions:
4.87 x 2.31 x 0.30 inches (123.8 x 58.6 x 7.6 mm)
Weight:
3.95 oz (112 g)
the average is 4.3 oz (124 g)

DISPLAY

Physical size:
4.0 inches
Resolution:
640 x 1136 pixels
Pixel density:
326 ppi
Technology:
IPS LCD
Colors:
16 777 216
Touchscreen:
Capacitive, Multi-touch
Features:
Light sensor, Proximity sensor

BATTERY

Stand-by time:
9.4 days (225 hours)
the average is 19 days (466 h)
Talk time (3G):
8.00 hours
the average is 8 h (497 min)
Capacity:
1440 mAh

HARDWARE

System chip:
Apple A6
Processor:
Dual core, 1300 MHz, Apple Swift
Graphics processor:
PowerVR SGX543MP3
System memory:
1016 MB RAM
Built-in storage:
16 GB , 32 GB Etc

CAMERA

Camera:
8 megapixels
Flash:
LED
Aperture size:
F2.4
Features:
Back-illuminated sensor (BSI), Auto focus, Touch to focus, Digital image stabilization, Face detection, Geo tagging, High Dynamic Range mode (HDR), Panorama
Camcorder:
1920x1080 (1080p HD) (30 fps)
Features:
Video calling, Digital image stabilization
Front-facing camera:
1.2 megapixels

MULTIMEDIA

Music player:
Filter by:
Album, Artist, Genre, Playlists
Features:
Album art cover, Background playback
Speakers:
Earpiece, Loudspeaker
YouTube player:
Yes

INTERNET BROWSING

Browser:

Yes
Built-in online services support:
YouTube (upload)

TECHNOLOGY

CDMA:
800, 1700/2100, 1900 MHz
GSM:
850, 900, 1800, 1900 MHz
UMTS:
850, 900, 1900, 2100 MHz
LTE:
700 MHz Class 13, 850 MHz, 1800 MHz, 1900 MHz, 2100 MHz
Data:
LTE Cat3 Downlink 100 Mbit/s, HSDPA+ (4G) 42.2 Mbit/s, UMTS, EDGE, GPRS, EV-DO Rev.A, EV-DO Rev.B
Positioning:
A-GPS, Glonass, Cell ID, Wi-Fi positioning
Navigation:
Turn-by-turn navigation


Latest Frimware

6.1.2 (5 GSM): iPhone5,1_6.1.2_10B146_Restore.ipsw
6.1.2 (5 GSM+CDMA): iPhone5,2_6.1.2_10B146_Restore.ipsw

User Guide

http://manuals.info.apple.com/en/iphone_user_guide.pdf

Repair Manual

iPhone 5 Repair Manual - iFixit


Update your device using iTunes


  • Ensure that you're using the latest version of iTunes.
  • Connect your device to your computer using the included USB cable.
  • After iTunes opens, select your device when it appears in iTunes under Devices.
  • Click "Check for Update" in the Summary pane to check for available updates.


  • If an update is available, iTunes prompts you to download and install the update. Do not disconnect your device until the update has finished.


Update your device wirelessly
  • Make Sure your device is connected to a power source ( Charger or PC Port with USB ). To avoid potential data costs connect your device to a Wi-Fi network.
  • Go to Settings > General > Software Update. iOS will automatically check for available updates.

  • If an update is available* you can tap Download to download the update.
  • After the download has completed tap Install to update your iOS.
  • If you leave the update to download in the background, once the download has finished you will receive a notification saying an update is available for your device. Tapping Details will take you to Settings > General > Software Update. Tap Install Now to install the iOS update. If you decide to leave the installation for later Settings will display notification badge until the update has been installed.

Update your iPhone 5 using iTunes

Ensure that you're using the latest version of iTunes.
  • Connect your device to your computer using the included USB cable.
  • After iTunes opens, select your device when it appears in iTunes under Devices.
  • Click "Check for Update" in the Summary pane to check for available updates.


  • If an update is available, iTunes prompts you to download and install the update. Do not disconnect your device until the update has finished.


Update your device wirelessly

  • Make Sure your device is connected to a power source ( Charger or PC Port with USB ). To avoid potential data costs connect your device to a Wi-Fi network.
  • Go to Settings > General > Software Update. iOS will automatically check for available updates.


  • If an update is available* you can tap Download to download the update.
  • After the download has completed tap Install to update your iOS.


  • If you leave the update to download in the background, once the download has finished you will receive a notification saying an update is available for your device. Tapping Details will take you to Settings > General > Software Update. Tap Install Now to install the iOS update. If you decide to leave the installation for later Settings will display notification badge until the update has been installed.


Emergency Update ( not power On properly or other problem )
In Cause Of Hang First Try Reboot Ur Phone
For reboot U need Press " Home + Power on " For few Second it will Shut Ur Device not Power on it

If Phone Not Power On U want Update Phone User This Guide

Requirements ,

Ensure that you're using the latest version of iTunes.
computer , USB cable And Latest Firmware Download From

instructions

  • If Ur Phone Is Stuck on Boot or Hang ,Do these Steps .
  • Power of It Using Press " Home + Power On " . Wait Few seconds .
  • Press Only " Home Button " and Insert USB cable make Sure USB attach With Computer properly Directly with out any Hub .
  • Now Phone will Power on in Recovery Mode

Follow same Steps To Update Phone ,

Monday, May 13, 2013

How To: Install ADB and Fastboot on your Windows computer for use with your Android p

How To: Install ADB and Fastboot

Anyone that has ever tried to mod their Android phone has come across users telling other users to run various different ADB and/or Fastboot commands. The only problem is the average Joe has no idea what ADB and Fastboot are because, well, they aren’t your run-of-the-mill applications. I was completely lost myself when I first ventured into the world of Android. Hopefully this guide makes it simple and straightforward to get ADB and Fastboot installed on your computer.

WHAT ARE ADB AND FASTBOOT AND WHY DO I NEED THEM


ADB stands for Android Debug Bridge, while Fastboot stands for, well, Fastboot. Without going into too many technical details (trust me you don’t want technical details), let’s just say they are two command-line tools used when modding/hacking Android phones.

You need ADB and Fastboot if you are one of those people that like to mod/hack your Android phone. While many mods/hacks are now becoming more main-stream-user friendly with GUIs (i.e. they no longer require users to use ADB or Fastboot), there are still times when users need to use ADB and/or Fastboot. (Anyone with a Google Nexus One or Nexus S knows what I mean.) While you may not necessarily ever use ADB or Fastboot (depends on what phone you have, and the type of developer support it gets), it is always nice to have them installed when the time comes that you do need them.

INSTALLING ADB AND FASTBOOT

Installing ADB and Fastboot is actually very easy:

The following guide is for Windows PCs only, but ADB/Fastboot can be installed on Linux and Mac OS X also. (You just do it differently for Linux/Mac OS X.) Also note that this guide was written on a Windows 7 computer. However, the guide will work on Windows 8/XP/Vista the same way; I don’t know about earlier versions of Windows.

http://dottech.org/downloads/adb_fas...ther_tools.zip
(11 MB) ADB, Fastboot, and other tools.


Note: The tools found in the download are provided by Google, found in Android SDKhttp://developer.android.com/sdk/index.html. I have simply extracted the tools and uploaded them for easy access, instead of telling everyone to download the whole SDK. You can get the same tools if you download the Android SDK directly from Google.
Extract the contents directly into your C:\ partition. You should now have a folder C:\Android that looks something like this:


Press Win + R on your keyboard to bring up the Run dialog.
Once the Run box is open, type in sysdm.cpl and hit OK:


Once you hit OK, the System Properties panel should open; click on the Advanced tab:


From the Advanced tab click on Environment Variables:


At the Environment Variables window find where it says Path under System variables, click on it, and click the Edit button:


When the Edit System Variable window pops up, type in ;C:\Android at the very end and hit OK:


Make sure you type in exactly ;C:\Android (be sure to include the semi-colon at the beginning).

After clicking OK, close out all windows. You are done!

USING ADB AND FASTBOOT

Once you have them installed, using ADB or Fastboot is as easy as opening command prompt, typing in adb xxx or fastboot xxx (with xxx being the command you want to run)…


nd hitting Enter on your keyboard to execute the command.

Take note, however, installing ADB and Fastboot is not enough to start using it with your phones. You need to install the relevant drivers on your computer – so your PC recognizes your phone – before ADB or Fastboot will be able to work with it. If you don’t have any drivers installed, you will get an error similar to the following:


If you don’t have the proper drivers installed, read dotTech’s article on[Android] Downloads links for USB (adb and fastboot) drivers for Windows for all Android phones and tablets | Reviews, news, tips, and tricks | dotTech