Tutorial Guide
1- We are going to make a USB with Windows XP + Windows 7.
2- You need a Windows based PC to work with this tutorial, and you need to work with elevated privileges “Run as administrator” whenever needed if you are working from a Windows Vista or 7 environment.
3- You need a minimum 4 GB USB 2.0 or 8 GB USB flash drive(depend sa size of both OS )
4- You need to download the following files from (HERE) tapos EXTRACT nyo onto your desktop:
- WinSetupFromUSB-Modified (11.3 MB)
- bootfiles ( 658 bytes )
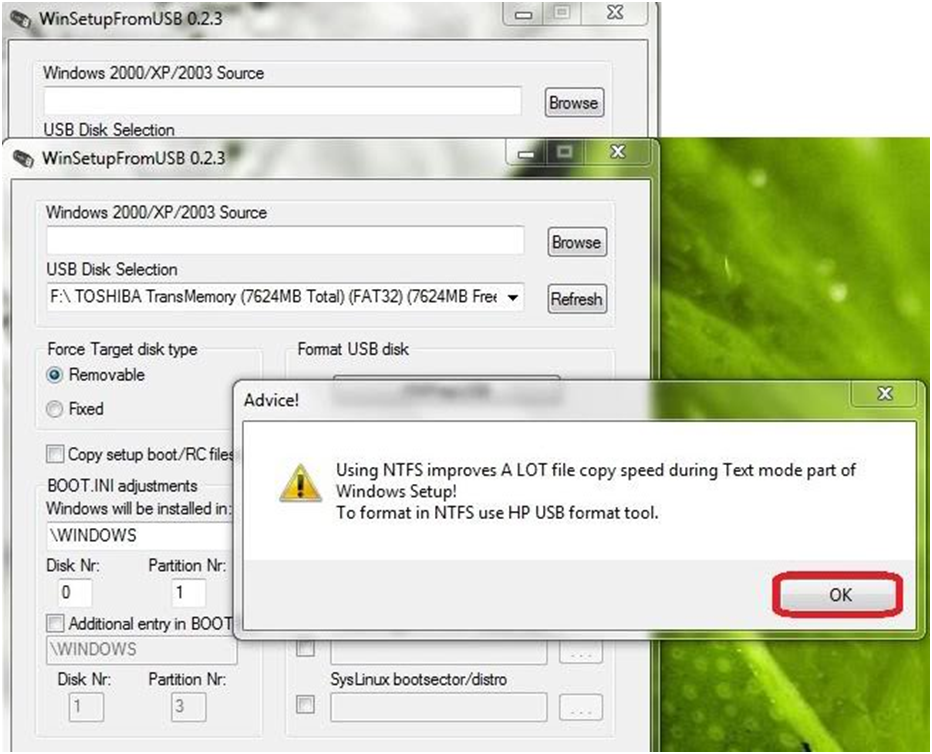
5- Open folder (WinSetupFromUSB-Modified) and right click on WinSetupFromUSB_0-2-3.exe and choose to “Run as administrator” you would see the following , Press OK:
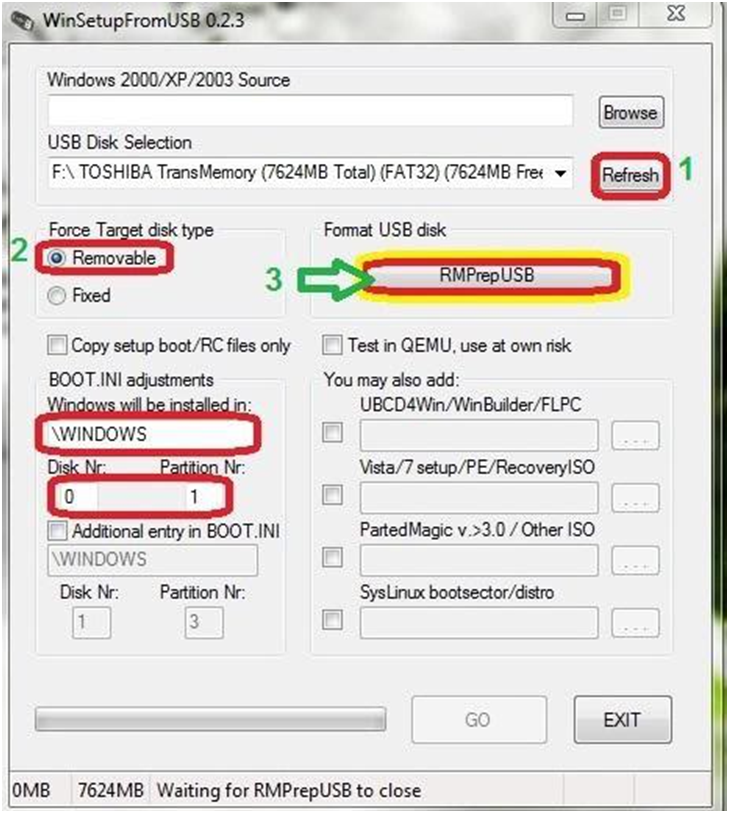
6- Make sure you follow what you see in below before pressing on “RMPrep USB” button:
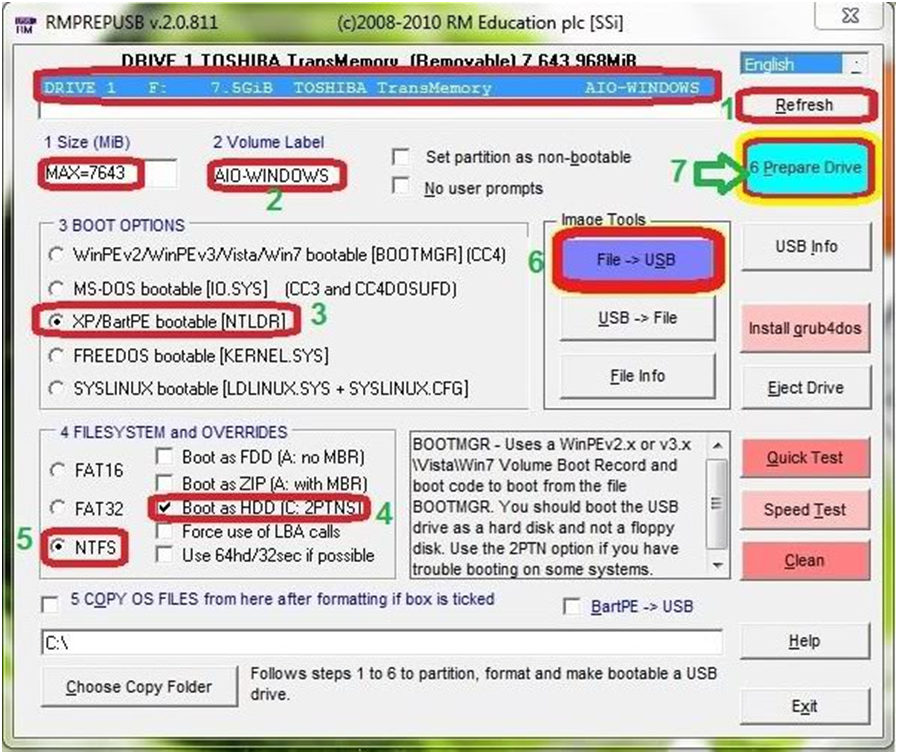
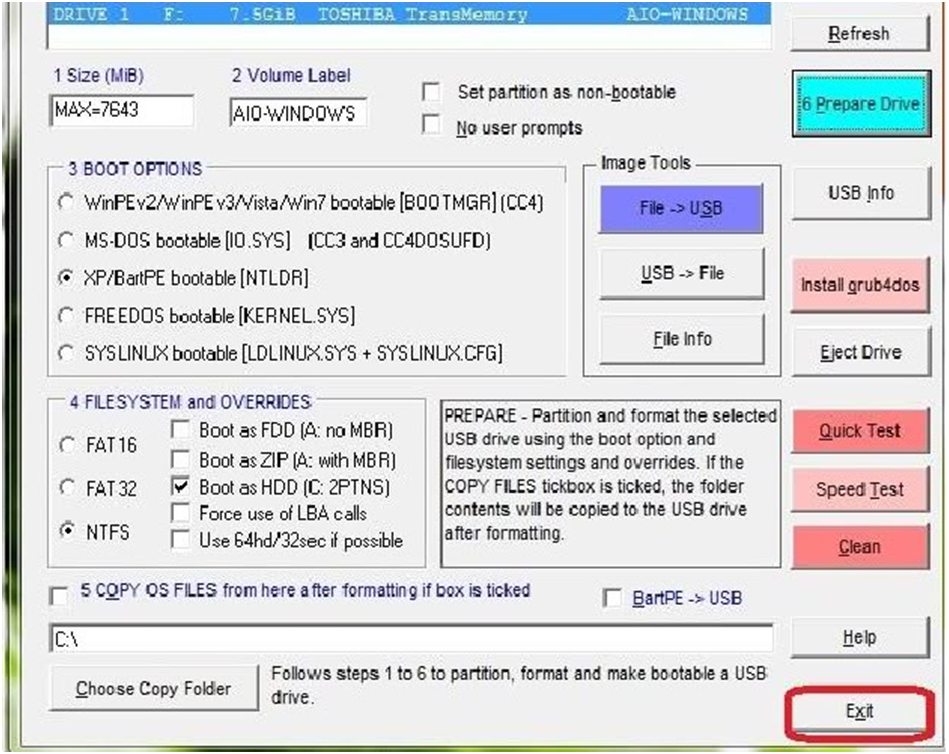
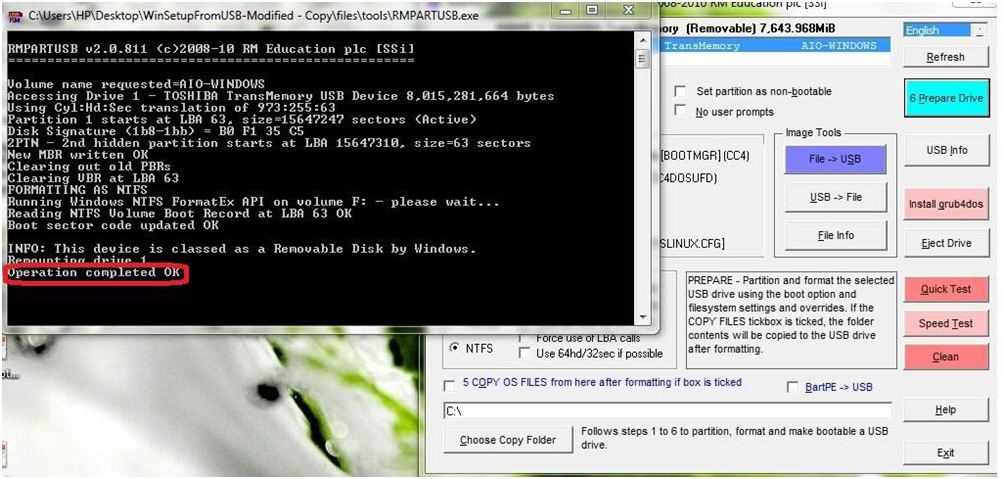
7- RMPREPUSB v.2.0.811 tool will pop up, so make sure everything is like what you see below before you press the “Prepare Drive” button.
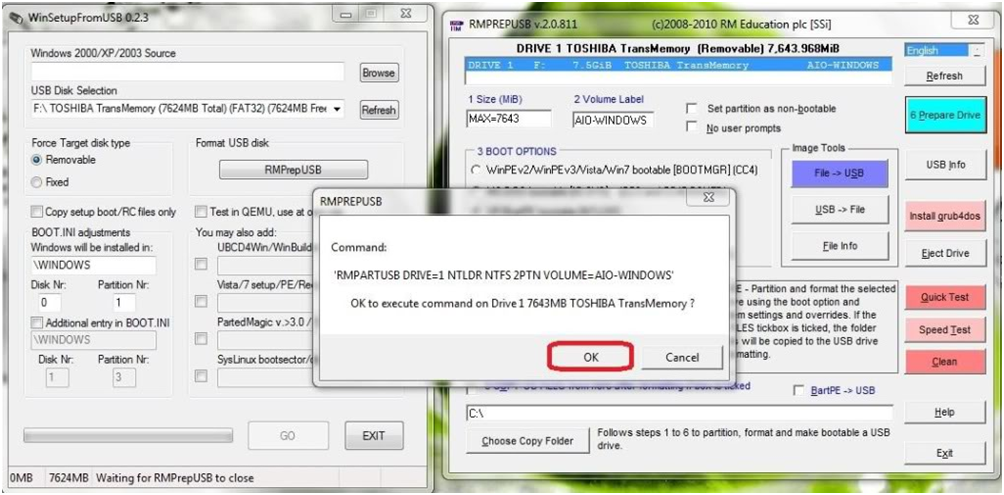
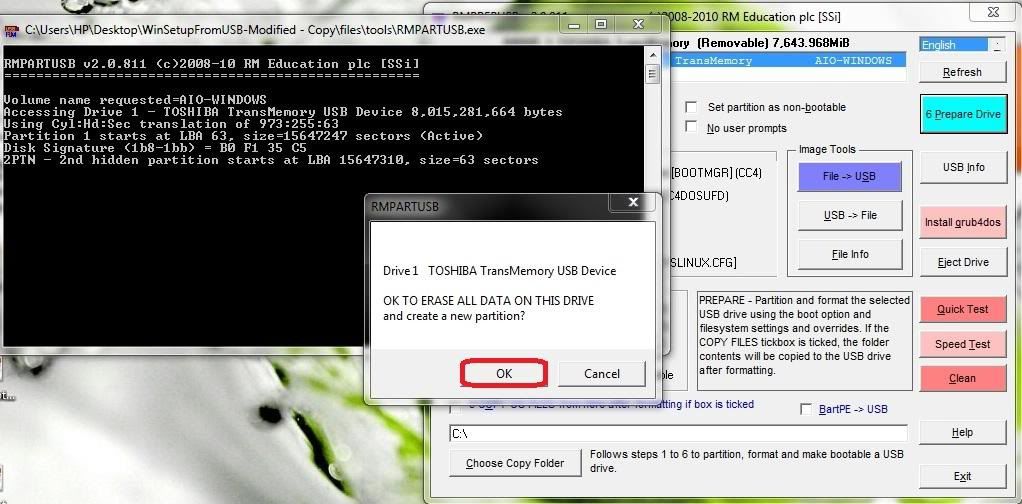
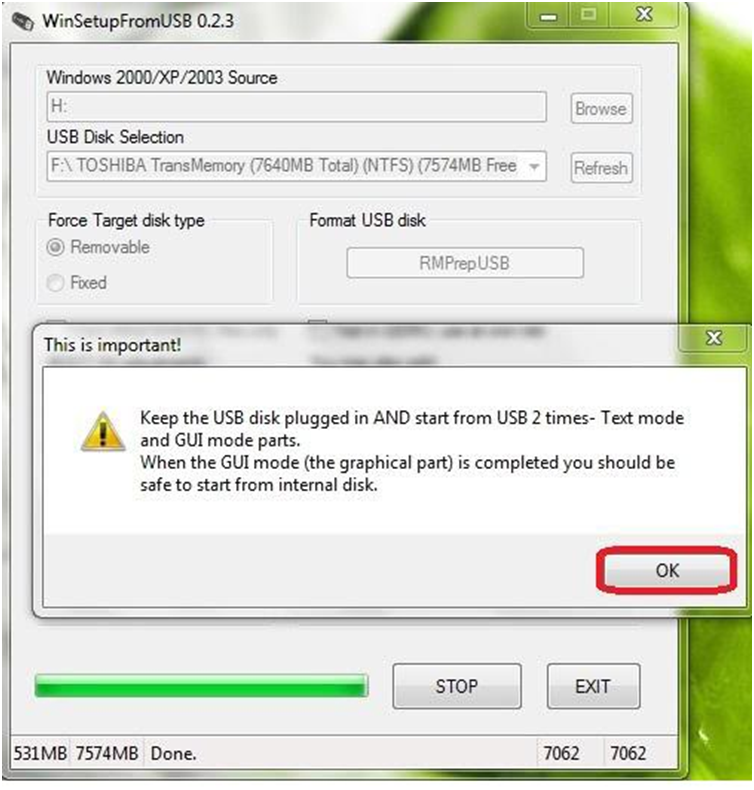
8- Press “OK “on the next screen.
9- Press “OK” on the next screen also:Note: (Sometimes the image Below will not appear just skip to the next step)
1- We are going to make a USB with Windows XP + Windows 7.
2- You need a Windows based PC to work with this tutorial, and you need to work with elevated privileges “Run as administrator” whenever needed if you are working from a Windows Vista or 7 environment.
3- You need a minimum 4 GB USB 2.0 or 8 GB USB flash drive(depend sa size of both OS )
4- You need to download the following files from (HERE) tapos EXTRACT nyo onto your desktop:
- WinSetupFromUSB-Modified (11.3 MB)
- bootfiles ( 658 bytes )
5- Open folder (WinSetupFromUSB-Modified) and right click on WinSetupFromUSB_0-2-3.exe and choose to “Run as administrator” you would see the following , Press OK:
6- Make sure you follow what you see in below before pressing on “RMPrep USB” button:
7- RMPREPUSB v.2.0.811 tool will pop up, so make sure everything is like what you see below before you press the “Prepare Drive” button.
8- Press “OK “on the next screen.
9- Press “OK” on the next screen also:Note: (Sometimes the image Below will not appear just skip to the next step)
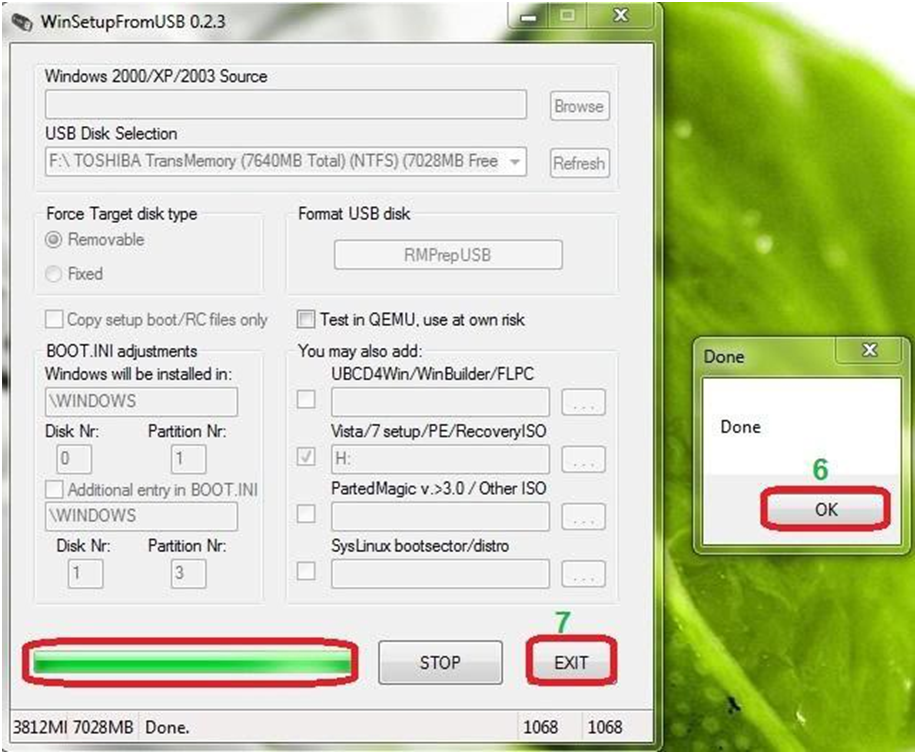
10- Exit the PREPUSB tool:
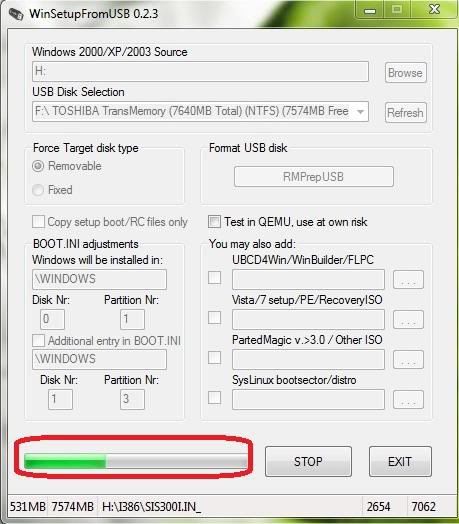
11- Now Insert the Windows XP CD into the drive bay and follow what you see below, my drive is H, yours maybe different:
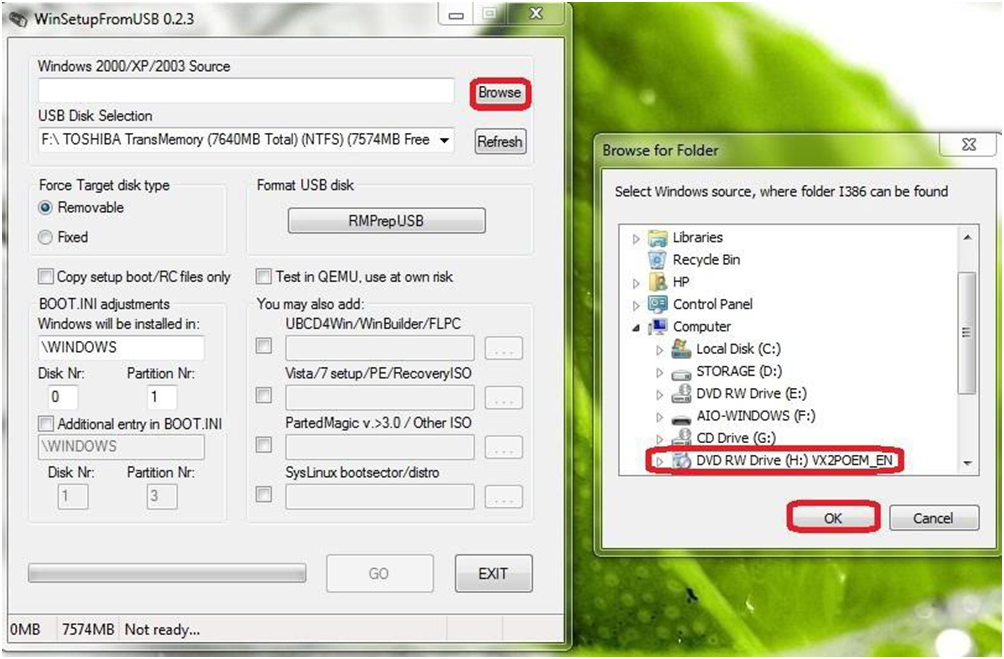
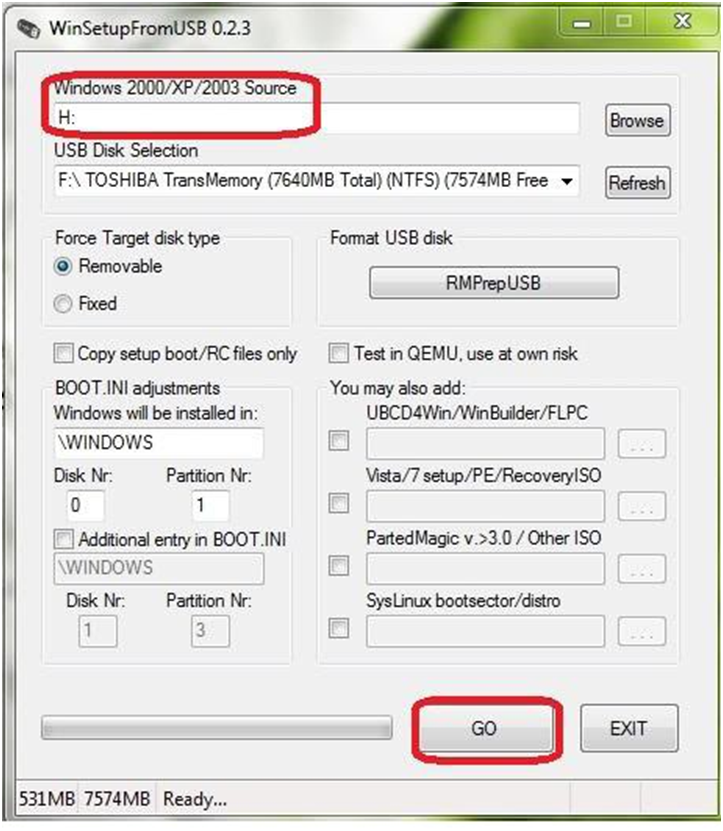
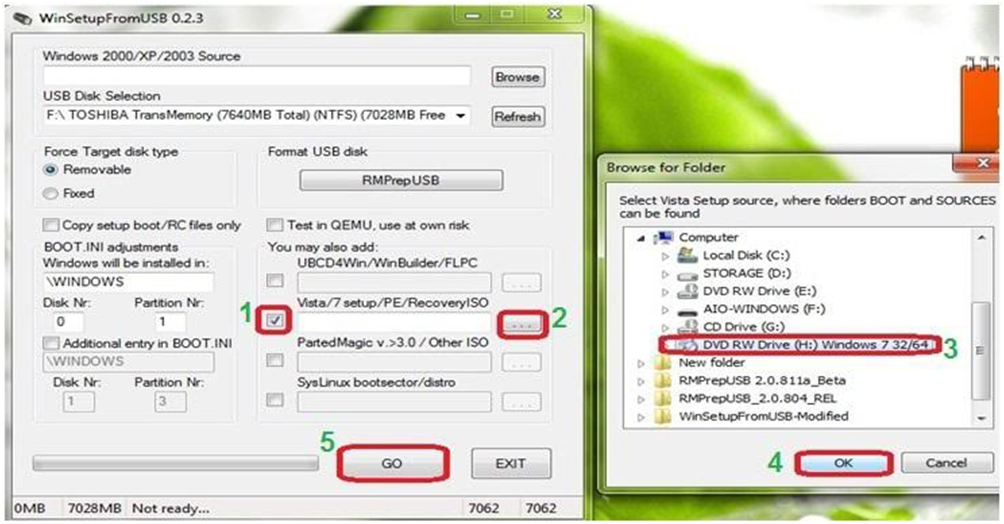
12- Now we will insert the Windows 7 installation DVD into the drive bay and follow below:
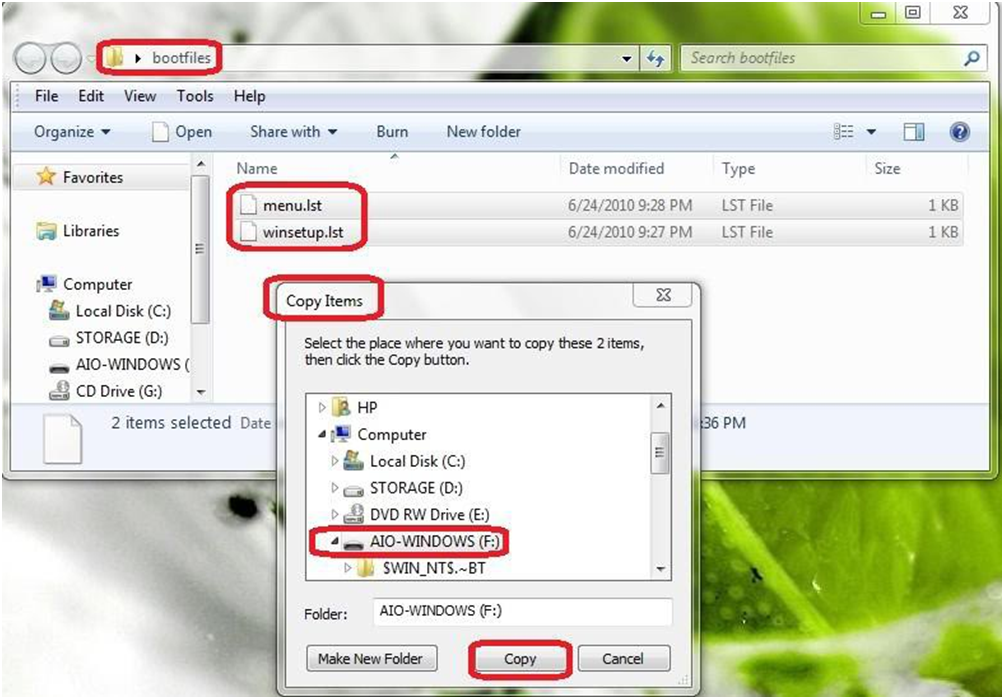
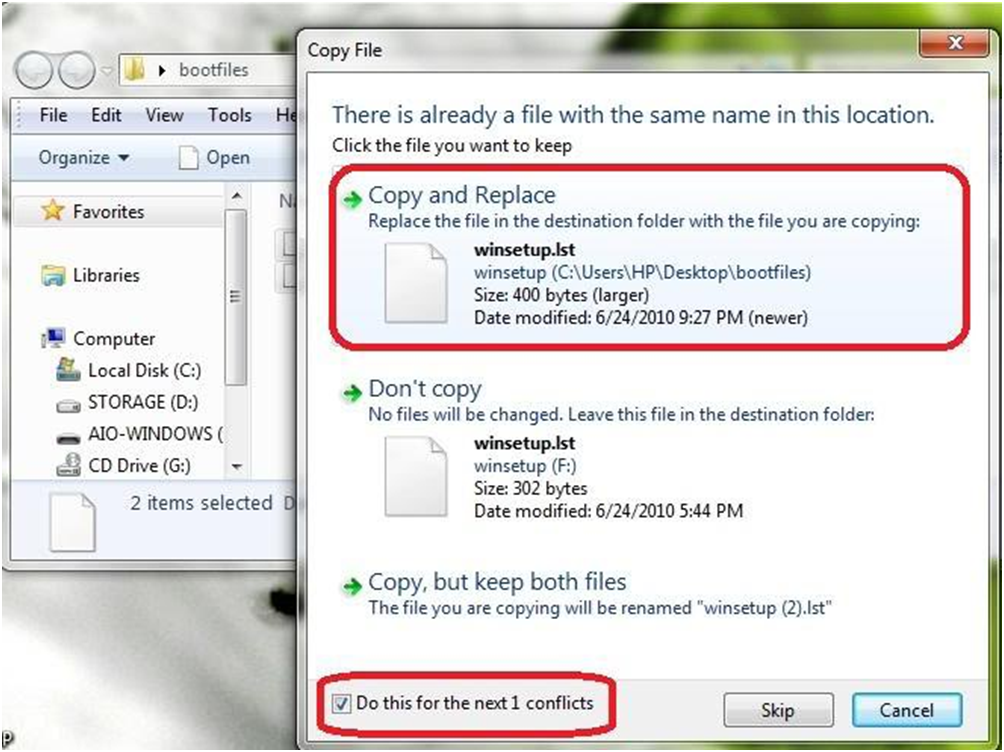
13- Now OPEN folder (bootfiles) that you extracted from the RAR file you downloaded early in step 4 above, and copy all its contents to the USB thumb drive and replace all existing files there:
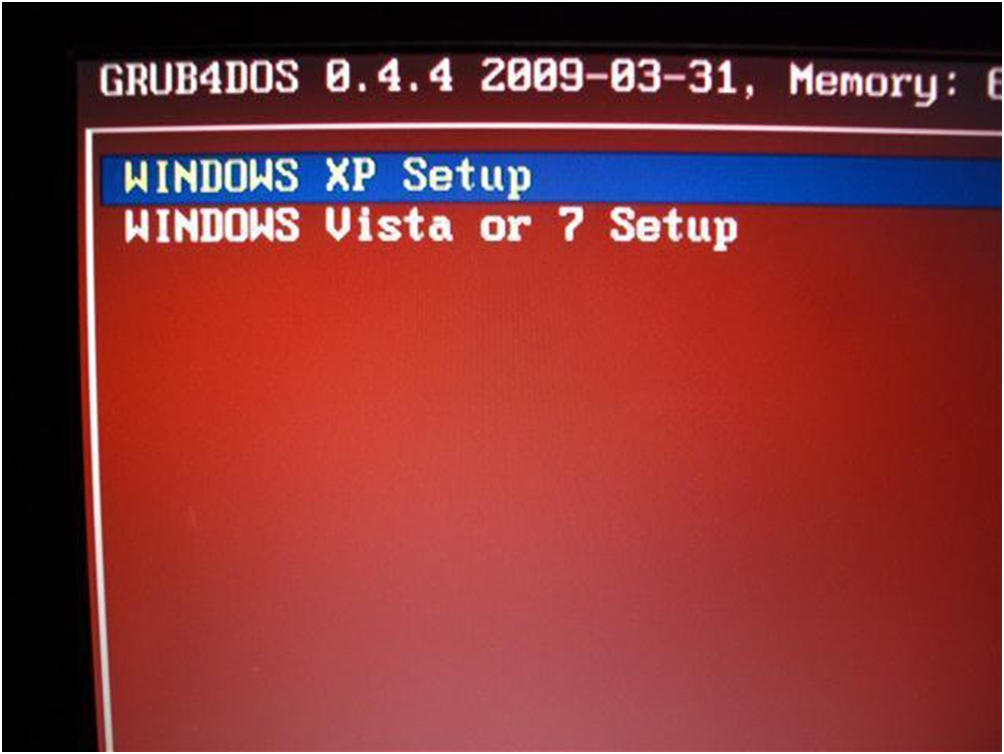
14- Now you've DONE > <...the USB drive is ready to be tested,boot from a USB device.
11- Now Insert the Windows XP CD into the drive bay and follow what you see below, my drive is H, yours maybe different:
12- Now we will insert the Windows 7 installation DVD into the drive bay and follow below:
13- Now OPEN folder (bootfiles) that you extracted from the RAR file you downloaded early in step 4 above, and copy all its contents to the USB thumb drive and replace all existing files there:
14- Now you've DONE >
.................................................. ......................
“Win Setup from USB” tool, that worked perfectly nice, with no errors of any kind, and we are going to use it in this tutorial"
PS: If you want to input Windows Vista instead of
Windows 7 on USB you should use Vista installation media from step 12
onwards , and you should know that with this method you can’t input all
3 Windows (XP/ Vista / 7), that will not work, only 2 at a time you
can choose
No comments:
Post a Comment